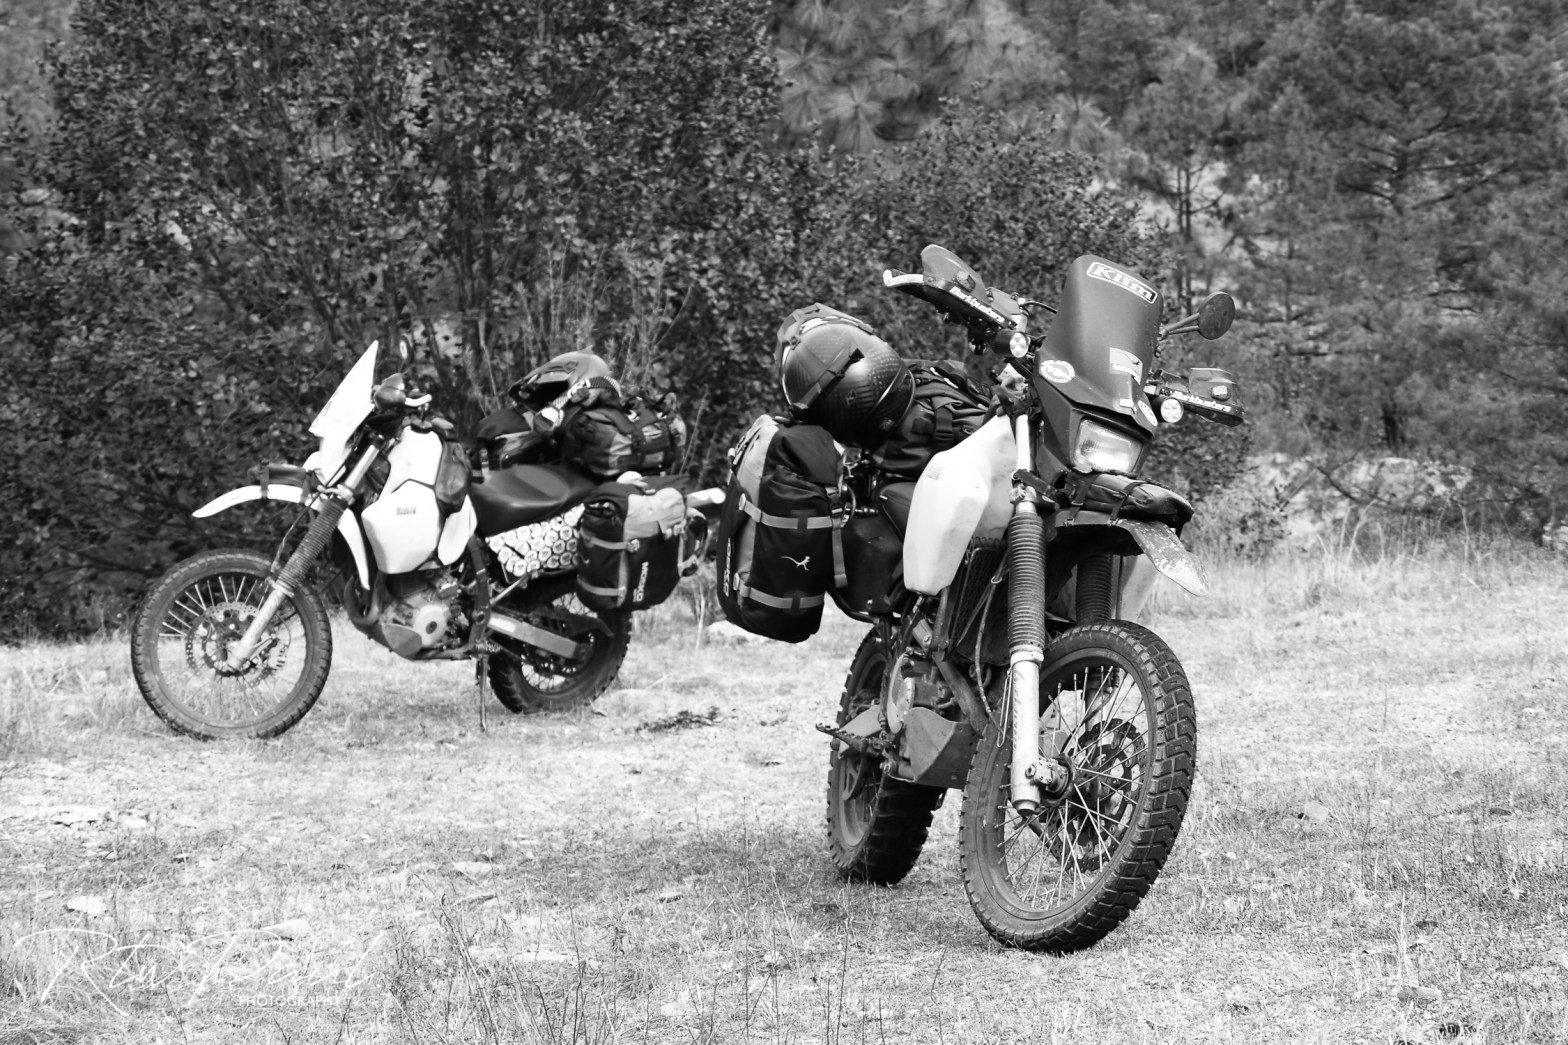
In a week, we leave the US to ride south on our two DR650’s, we have just ridden across the US and Canada on what we like to call a test ride, of 20,000 miles. Now there is a little service work to do and a few items to change due to failure, fix some areas that failed, make other areas better and some just leave alone.
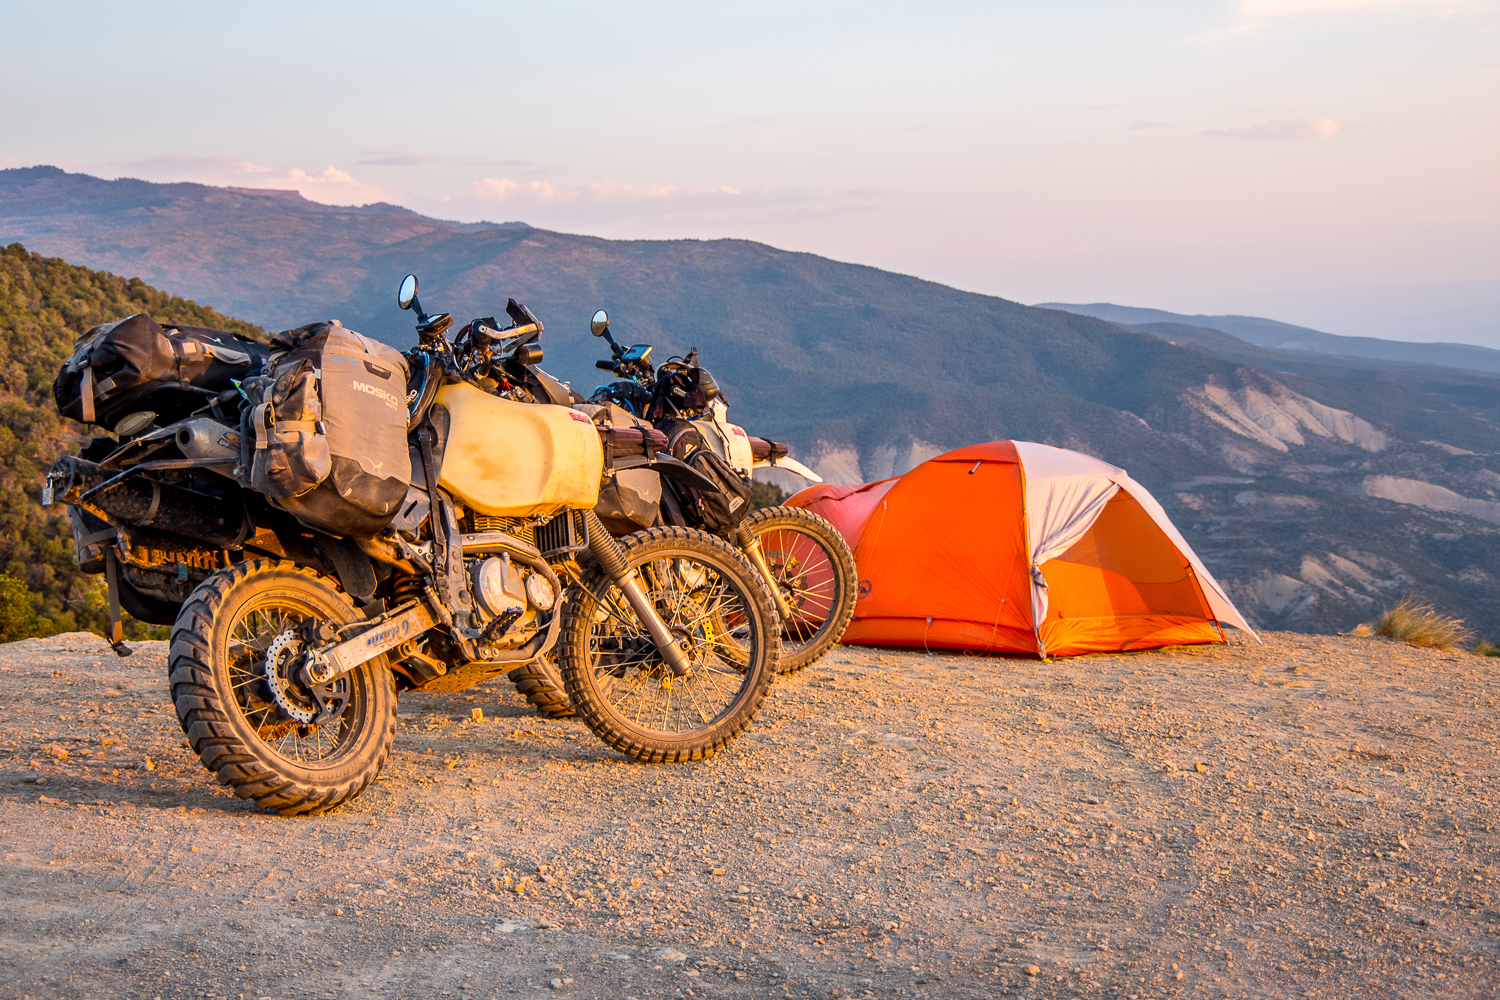
The bikes are now ready to continue onwards and southwards, we travel s.l.o.w.l.y. to take in countries for a long time when and where possible, we are in the mindset of 3-6 months per country as we’ll ride south and then back north trying to complete a loop of South America
Cuba is also on the horizon again, this time offroad when and where possible  and Central America (maybe) on the way north – so as rough calculation we are talking years until we speak English as a first language again…stayed tuned
Next post will be tools and packing, this post is final prep of the bikes
We have got emails asking for more details, so here you go. This is the first time owning a DR650 so the ‘test ride’ was good and offered an insight into how capable this bike really is.
If you read the original build thread a massive amount of work was done to the bikes to get them ready, its long and very detailed – here
The lists – and I will break them down into more detail as too why if it’s unclear
Basic service was completed on –
- oil change
- clean filter
- grease neck bearings
- grease swingarm bearings
- grease shock pivot
- check and set the valves
- new brake pads
Everything else
- vacuum flush brakes and change the fluid
- recover seats
- rebuild carbs
- air filters and socks
- chain guard
- cush drive rubbers
- sprockets and spares
- chain swap
- weld rear rack to add structure
- side stand foot
- headlights swap
- turn signal swap
- make fairing
- tool tube swap
- weld exhaust
- tank rubbers
- foot peg spring
- license plate security screws
- weld on side stand foot
- valve cover bolt
- heated jacket
- make windshield
- make front tank mount
The basic service stuff is simply that – basic, something we all do; but as we will ride from Arizona straight into Mexico it is just a good feeling to have all new consumables in place. Some weren’t necessary but why ride with brake pads that have maybe 2-3,000 miles left on them and then have the hassle of finding replacements? I know now I’m good for another 20,000 miles or more – make sense?
Everything else
- bleed the brakes and change the fluid
brake fluid is a consumable and easily forgotten, it breaks down from heat and moisture. All summer long we were in the ria or in the mountains braking hard, a few dollars for fresh fluid is a no brainer…when was the last time you changed yours?
I had a Seat Concepts and Egle has a Sargent, mine was looking a little worse for wear and she simply didn’t like her’s at all, very uncomfortable for long days in the saddle. New seats are both from Seat Concepts, the commuter. it fits our riding style and is good and comfortable
![[IMG]](https://photos.smugmug.com/RTW-on-dirt/November-maintenence/i-b28mB9F/0/e2ba4e01/X2/test%20ride-25-X2.jpg)
In Newfoundland, we had major carb issues! The float is held in place by two O rings that I had replaced 10,000 miles before. The had dried out, shrunk and become brittle, this allowed the float to move when riding causing an overly rich mixture because the gas constantly flowed.
So as we are now at 20,000 miles into this ride it seemed obvious to check 10 + 10, get my thinking? They were good so all I can figure is I got a bad batch of O rings (I now have spares as well). The simple test here is to check as you put the float in place on the carb body it ‘clicks’ into place, then make sure your float height is correct and replace the float bowl.
An added way to check everything is good when on the road is add a small length of clear tubing to the float drain. This is a visual aid – if you crack the float bowl drain screw the level in the tube is held against the carb body should be around 1-2mm above the line where the float bowl attaches to the body. This will save time on the road if you have a carb issue. this way you can check float height at a glance and if you have a stuck float.
![[IMG]](https://photos.smugmug.com/RTW-on-dirt/November-maintenence/i-c6SghB8/0/60de9111/X2/test%20ride-6-X2.jpg)
![[IMG]](https://photos.smugmug.com/RTW-on-dirt/November-maintenence/i-qx6g6vb/0/c8062175/X2/test%20ride-10-X2.jpg)
new filters and socks, again to leave with fresh consumables, fresh filter oil, and a clean sock to make a filter cleaning in remote locations a breeze, we also carry extra socks. Remove side cover take off a dirty sock, put a clean sock on – ride!
![[IMG]](https://photos.smugmug.com/RTW-on-dirt/November-maintenence/i-GPVL7rL/0/7be75a8d/X2/test%20ride-29-X2.jpg)
The stock chain guard is weak and flimsy so a little repair was needed, redneck engineering – siding and rivets!
As the bikes were used with 20,000+ miles on them when we got the who knows if the cush drive rubbers were original or not. They lasted until about 38,000 miles then they needed to be replaced but replacements couldn’t be found where we were (at least one month wait) so, I did the quick fix – for those of you that aren’t familiar, a 1×1 inch square of inner tube put in next to the stock rubber adds a little width and takes away that jerking feeling that bad rubbers will give you. New ones installed so good again for around 40,000 miles, maybe enough to ride to Ushuaia?
These two are obviously together, I have changed from the 525 to the 520 after a snapped chain in Vermont and a bike shop not knowing what a 525 was! Central and South America has a limited supply of 525 chains so planning ahead is required or use a 520 and change slightly more often but have more availability. We carry spare front and rears bolted to the bike so all we’ll need to find is a chain for the next swap…should be good for 30-50,000 miles
![[IMG]](https://photos.smugmug.com/RTW-on-dirt/November-maintenence/i-PrQPMDN/0/5b31acdb/X2/test%20ride-31-X2.jpg)
- weld rear rack to add structure
the racks we got had a failure after about 12,000 miles from the rough riding on the Translab Highway at high speed. At the time a simple welding fix was done but to add some structure I have added an additional brace between the top and side racks and made so it’s removable when needed.
I have a friend who is in the process of designing a completely new styled rack that will be much better and structurally stronger but not heavier than whats available right now, but sadly it won’t be completed until next year
![[IMG]](https://photos.smugmug.com/RTW-on-dirt/November-maintenence/i-xHw7vzF/0/41059026/X2/test%20ride-30-X2.jpg)
I simply forgot to add a side stand foot on Egles bike, so just making up for my CRS issues, larger washer and also extended her side stand as her suspension has been reworked and the bike is now a little taller
![[IMG]](https://photos.smugmug.com/RTW-on-dirt/November-maintenence/i-rnK8TsQ/0/04b3e158/X2/test%20ride-26-X2.jpg)
- Suspension work, Cogent Dynamics did a service on both shocks and increased the spring rate on Egles as it was a little soft. Their shock is perfect for RTW riding they use common components that can be serviced almost anywhere @michnus
We rode 20,000 miles with an $8 LED headlight that DID NOT fail, in all actuality it was a great help riding offroad because it was simply more visible than stock especially in dusty conditions and if it had failed a replacement was a few days shipping away.
Now we are leaving the US getting a replacement is not so easy so I have refitted the stock lens but used a $15 LED instead of an H4, we’ll run these until they fail and then when needed H4’s are easy to obtain as we ride south
![[IMG]](https://photos.smugmug.com/RTW-on-dirt/November-maintenence/i-kt7JvLq/0/3155cb6d/X2/test%20ride-7-X2.jpg)
![[IMG]](https://photos.smugmug.com/RTW-on-dirt/November-maintenence/i-v7wLkK2/0/174ef802/X2/test%20ride-8-X2.jpg)
$10 trash can, 3-minute you-tube vid and now we have a windshield
![[IMG]](https://photos.smugmug.com/RTW-on-dirt/November-maintenence/i-gTMFnN7/0/098bcd10/X2/test%20ride-28-X2.jpg)
the turn signals were on the stock fairing so they needed to be moved, the glue holding them tore them apart so I replaced with a screw-in unit instead mounted onto the Barkbusters, these big Safari tanks limit what will work – mounted just outside the crash zone…hopefully
![[IMG]](https://photos.smugmug.com/RTW-on-dirt/November-maintenence/i-3HBp6NJ/0/6424456c/X2/test%20ride-33-X2.jpg)
I simply got tired of 3D Tetris every time I need a tool from the tool tube, I had reduced the length to about 20″ from 24″…I went back to a 24″ for sanities sake
On Egle’s bike, the rear mount had failed, so a quick fix was done
somehow, somewhere I had lost one rubber mount from under her tank when I took it off, replacements were ordered and glued in place. ***note to self, check both sides of frame to see they are both there before mounting the tank
![[IMG]](https://photos.smugmug.com/RTW-on-dirt/November-maintenence/i-cQXhKTV/0/da91b0b6/X2/test%20ride-5-X2.jpg)
One had snapped, this was a first for me, 2-minute fix/ replacement
Last year when I was in Mexico chatting with the police they were telling me in some cities there is a policy in place to remove the license plate from the vehicle and confiscate it until ‘the fine’ is paid. If the plate cannot be removed an officer may or may not be waiting for you by your vehicle when you return. Also, theft of none local plates in – enter a countries name – is a thing in some Latin countries like collecting trophies, this is a royal PITA if it happens…solution security torx – done
![[IMG]](https://photos.smugmug.com/RTW-on-dirt/November-maintenence/i-JVfw9nS/0/9837ed70/X2/test%20ride-9-X2.jpg)
on my bike the intake/ right bolt always felt like it was about to pull the threads out, I guess because this bike has been touched by so many prior to my ownership, so the few times I had taken off the valve cover I just babied the bolt back in – it just failed! Dam, remove head, drill, and tap, buy a new gasket, reset the timing chain etc…
NOPE – the bolt is a 6mm x 1.0 – there is a rarely used 7mm x 1.0 bolt, very lightly and carefully drill the hole out and retap, because the threads are the same pitch, not much material is harmed so the tap makes easy work of it…fixed. It leaves one problem, the head of the bolt is an 11mm wrench, I don’t carry one and really don’t want to for one bolt…grid down the head to fit a 10mm instead
Egle is cold a lot, so her bike now has a connection fitted so she can use her new Firstgear heated jacket
The stock original front tank mount was an aluminum piece, Safari does it to save weight obviously and they tell you if it breaks just order a new one, tough to do in Bolivia! I went to my buddies waterjet and made new stainless ones instead!
![[IMG]](https://photos.smugmug.com/RTW-on-dirt/November-maintenence/i-9bGJKx7/0/89b4f647/X2/test%20ride-34-X2.jpg)
![[IMG]](https://photos.smugmug.com/RTW-on-dirt/2017-dec-7th-to-16th/i-NzwC25g/0/83f3bddf/X2/december%20mexico-57-X2.jpg)
![[IMG]](https://photos.smugmug.com/RTW-on-dirt/2017-dec-7th-to-16th/i-DZfLZct/0/eaacea93/X2/december%20mexico-59-X2.jpg)
![[IMG]](https://photos.smugmug.com/RTW-on-dirt/2017-dec-7th-to-16th/i-W8kwcwh/0/cfe31218/X2/december%20mexico-2-X2.jpg)
![[IMG]](https://photos.smugmug.com/RTW-on-dirt/2017-dec-7th-to-16th/i-nCtnjjB/0/287e4935/X2/december%20mexico-6-X2.jpg)
![[IMG]](https://photos.smugmug.com/RTW-on-dirt/2017-dec-7th-to-16th/i-dQJdTJT/0/81644b35/X2/december%20mexico-3-X2.jpg)
![[IMG]](https://photos.smugmug.com/RTW-on-dirt/2017-dec-7th-to-16th/i-p5HmKNz/0/a569b623/X2/december%20mexico-7-X2.jpg)
![[IMG]](https://photos.smugmug.com/RTW-on-dirt/2017-dec-7th-to-16th/i-pS5fLKk/0/97ac7e9f/X2/december%20mexico-58-X2.jpg)
![[IMG]](https://photos.smugmug.com/RTW-on-dirt/2017-dec-7th-to-16th/i-kMTvbQV/0/ad5dddb3/X2/december%20mexico-60-X2.jpg)
![[IMG]](https://photos.smugmug.com/RTW-on-dirt/2017-dec-7th-to-16th/i-gVFH9Rc/0/65f8ba14/X2/december%20mexico-11-X2.jpg)
![[IMG]](https://photos.smugmug.com/RTW-on-dirt/2017-dec-7th-to-16th/i-hCSLTQH/0/505584e5/X2/december%20mexico-68-X2.jpg)
![[IMG]](https://photos.smugmug.com/RTW-on-dirt/2017-dec-7th-to-16th/i-FBtm8Qs/0/9b67d123/X2/december%20mexico-69-X2.jpg)
![[IMG]](https://photos.smugmug.com/RTW-on-dirt/2017-dec-7th-to-16th/i-6STw9Jp/0/c07ffa41/X2/december%20mexico-70-X2.jpg)
![[IMG]](https://photos.smugmug.com/RTW-on-dirt/2017-dec-7th-to-16th/i-thnfJh6/0/dfe784c5/X2/december%20mexico-22-X2.jpg)
![[IMG]](https://photos.smugmug.com/RTW-on-dirt/2017-dec-7th-to-16th/i-2dHpnk2/0/b13086cb/X2/december%20mexico-27-X2.jpg)
![[IMG]](https://photos.smugmug.com/RTW-on-dirt/2017-dec-7th-to-16th/i-CvVnKWZ/0/c4c98621/X2/december%20mexico-72-X2.jpg)
![[IMG]](https://photos.smugmug.com/RTW-on-dirt/2017-dec-7th-to-16th/i-t5LtPpG/0/f4d1efca/X2/december%20mexico-25-X2.jpg)
![[IMG]](https://photos.smugmug.com/RTW-on-dirt/2017-dec-7th-to-16th/i-tVC47K4/0/e91d882e/X2/december%20mexico-26-X2.jpg)
![[IMG]](https://photos.smugmug.com/RTW-on-dirt/2017-dec-7th-to-16th/i-r3C2SF7/0/b8e5068c/X2/december%20mexico-64-X2.jpg)
![[IMG]](https://photos.smugmug.com/RTW-on-dirt/2017-dec-7th-to-16th/i-4cV22q5/0/8ada70ca/X3/december%20mexico-73-X3.jpg)
![[IMG]](https://photos.smugmug.com/RTW-on-dirt/2017-dec-7th-to-16th/i-84XtVw5/0/33345fea/X3/december%20mexico-75-X3.jpg)
![[IMG]](https://photos.smugmug.com/RTW-on-dirt/2017-dec-7th-to-16th/i-br6KpLZ/0/df93dbe4/X3/december%20mexico-31-X3.jpg)
![[IMG]](https://photos.smugmug.com/RTW-on-dirt/2017-dec-7th-to-16th/i-XwnBvnX/0/5f67aca7/X3/december%20mexico-29-X3.jpg)
![[IMG]](https://photos.smugmug.com/RTW-on-dirt/2017-dec-7th-to-16th/i-NTsvdtv/0/aba7eb6f/X3/december%20mexico-32-X3.jpg)
![[IMG]](https://photos.smugmug.com/RTW-on-dirt/2017-dec-7th-to-16th/i-FHFZkKp/0/edc745f8/X3/december%20mexico-24-X3.jpg)
![[IMG]](https://photos.smugmug.com/RTW-on-dirt/2017-dec-7th-to-16th/i-wpDr3xm/0/e11f7298/X3/december%20mexico-34-X3.jpg)
![[IMG]](https://photos.smugmug.com/RTW-on-dirt/2017-dec-7th-to-16th/i-smKM3mR/0/ce726c86/L/december%20mexico-41-L.jpg)
![[IMG]](https://photos.smugmug.com/RTW-on-dirt/2017-dec-7th-to-16th/i-MTRzPqc/0/af67ae05/L/december%20mexico-82-L.jpg)
![[IMG]](https://photos.smugmug.com/RTW-on-dirt/2017-dec-7th-to-16th/i-dmvD5Mk/0/7064acb7/X2/december%20mexico-79-X2.jpg)
![[IMG]](https://photos.smugmug.com/RTW-on-dirt/2017-dec-7th-to-16th/i-dsLr53v/0/c62ace05/X2/december%20mexico-80-X2.jpg)
![[IMG]](https://photos.smugmug.com/RTW-on-dirt/2017-dec-7th-to-16th/i-qRGqprX/0/19b34b4d/X2/december%20mexico-77-X2.jpg)
![[IMG]](https://photos.smugmug.com/RTW-on-dirt/2017-dec-7th-to-16th/i-z2qcRpg/0/6aa19404/X2/december%20mexico-43-X2.jpg)
![[IMG]](https://photos.smugmug.com/RTW-on-dirt/2017-dec-7th-to-16th/i-dtTQ6vW/0/cc7e6c72/X2/december%20mexico-44-X2.jpg)
![[IMG]](https://photos.smugmug.com/RTW-on-dirt/2017-dec-7th-to-16th/i-L8m3cNZ/0/74816116/X2/december%20mexico-46-X2.jpg)
![[IMG]](https://photos.smugmug.com/RTW-on-dirt/2017-dec-7th-to-16th/i-GzqTnJ8/0/d11ec756/X2/december%20mexico-16-X2.jpg)
![[IMG]](https://photos.smugmug.com/RTW-on-dirt/2017-dec-7th-to-16th/i-fttkkgT/0/853e1c75/X2/december%20mexico-84-X2.jpg)
![[IMG]](https://photos.smugmug.com/RTW-on-dirt/2017-dec-7th-to-16th/i-nbDJ97J/0/25194b69/X2/december%20mexico-81-X2.jpg)
![[IMG]](https://photos.smugmug.com/RTW-on-dirt/2017-dec-7th-to-16th/i-tQ72qTf/0/cda773f2/X2/december%20mexico-47-X2.jpg)
![[IMG]](https://photos.smugmug.com/RTW-on-dirt/2017-dec-7th-to-16th/i-vpw6Vg6/0/e4aaf38e/X2/december%20mexico-48-X2.jpg)
![[IMG]](https://photos.smugmug.com/RTW-on-dirt/2017-dec-7th-to-16th/i-gxFKSXS/0/4d25fe61/X2/december%20mexico-50-X2.jpg)
![[IMG]](https://photos.smugmug.com/RTW-on-dirt/2017-dec-7th-to-16th/i-s955hgx/0/e8dac479/X2/december%20mexico-49-X2.jpg)
![[IMG]](https://photos.smugmug.com/RTW-on-dirt/2017-dec-7th-to-16th/i-6gJP4XR/0/75063406/X2/december%20mexico-42-X2.jpg)
![[IMG]](https://photos.smugmug.com/RTW-on-dirt/2017-dec-7th-to-16th/i-bQZwnxQ/0/80ae1240/X2/december%20mexico-83-X2.jpg)
![[IMG]](https://photos.smugmug.com/RTW-on-dirt/2017-dec-7th-to-16th/i-Dftc56T/0/ccca5ecd/X2/december%20mexico-19-X2.jpg)


![[IMG]](https://photos.smugmug.com/RTW-on-dirt/2017-nov-18-to-dec-6/i-wXxKVsH/0/33e1be4a/X2/packing-26-X2.jpg)
![[IMG]](https://photos.smugmug.com/RTW-on-dirt/2017-nov-18-to-dec-6/i-FLRnzkc/0/3798dc2e/X2/packing-7-X2.jpg)
![[IMG]](https://photos.smugmug.com/RTW-on-dirt/2017-nov-18-to-dec-6/i-QGrtpJN/0/4985f817/X2/packing-8-X2.jpg)
![[IMG]](https://photos.smugmug.com/RTW-on-dirt/2017-nov-18-to-dec-6/i-H5w9B32/0/45a215cd/X2/packing-27-X2.jpg)
![[IMG]](https://photos.smugmug.com/RTW-on-dirt/2017-nov-18-to-dec-6/i-rxsRhzG/0/41333207/X2/packing-14-X2.jpg)
![[IMG]](https://photos.smugmug.com/RTW-on-dirt/2017-nov-18-to-dec-6/i-d3b6qF7/0/bd095e33/X2/packing-12-X2.jpg)
![[IMG]](https://photos.smugmug.com/RTW-on-dirt/2017-nov-18-to-dec-6/i-TGhgJ8x/0/01812343/X2/packing-9-X2.jpg)
![[IMG]](https://photos.smugmug.com/RTW-on-dirt/2017-nov-18-to-dec-6/i-P68tnKN/0/467e54c2/X2/packing-10-X2.jpg)
![[IMG]](https://photos.smugmug.com/RTW-on-dirt/2017-nov-18-to-dec-6/i-KMztVXP/0/b40ed6dc/X2/packing-11-X2.jpg)
![[IMG]](https://photos.smugmug.com/RTW-on-dirt/2017-nov-18-to-dec-6/i-7TqrWfh/0/f4c71b57/X2/packing-13-X2.jpg)
![[IMG]](https://photos.smugmug.com/RTW-on-dirt/2017-nov-18-to-dec-6/i-vbrv7Q2/0/81562f21/X2/packing-16-X2.jpg)
![[IMG]](https://photos.smugmug.com/RTW-on-dirt/2017-nov-18-to-dec-6/i-ttgBLHC/0/259cd9fe/X2/packing-15-X2.jpg)
![[IMG]](https://photos.smugmug.com/RTW-on-dirt/2017-nov-18-to-dec-6/i-k5vkSwG/0/618d880d/X2/packing-18-X2.jpg)
![[IMG]](https://photos.smugmug.com/RTW-on-dirt/2017-nov-18-to-dec-6/i-9cQQwCs/0/2f91acd4/X2/packing-25-X2.jpg)
![[IMG]](https://photos.smugmug.com/RTW-on-dirt/2017-nov-18-to-dec-6/i-K7RJ8vC/0/a786f288/X2/packing-22-X2.jpg)
![[IMG]](https://photos.smugmug.com/RTW-on-dirt/2017-nov-18-to-dec-6/i-zfMGB3H/0/730c505a/X2/packing-24-X2.jpg)


![[IMG]](https://photos.smugmug.com/RTW-on-dirt/November-maintenence/i-zGpLxdd/0/8af8c612/X2/packing-3-X2.jpg)
![[IMG]](https://photos.smugmug.com/RTW-on-dirt/November-maintenence/i-MxZ7Jvw/0/4fdadb09/X2/packing-5%20%20numbered%20egle-X2.jpg) 1.
1. ![[IMG]](https://photos.smugmug.com/RTW-on-dirt/November-maintenence/i-JnhM5QP/0/9202cdfe/X2/packing-7%20paul%20numbered-X2.jpg) 1. Tools – more detail later
1. Tools – more detail later![[IMG]](https://photos.smugmug.com/RTW-on-dirt/November-maintenence/i-jBsRMDd/0/7fcb5c4c/X2/packing-8-X2.jpg)
![[IMG]](https://photos.smugmug.com/RTW-on-dirt/November-maintenence/i-tWjgzLj/0/7717ffd7/X2/test%20ride-21-X2.jpg)
![[IMG]](https://photos.smugmug.com/RTW-on-dirt/November-maintenence/i-xc2xmVv/0/3a5fef40/X2/test%20ride-22-X2.jpg)
![[IMG]](https://photos.smugmug.com/RTW-on-dirt/November-maintenence/i-CHp2QHt/0/d438c324/X2/test%20ride-23-X2.jpg)


![[IMG]](https://photos.smugmug.com/RTW-on-dirt/2017-9-22-to-10-10/i-CD63X7r/0/942753e9/X2/mag-X2.jpg)
![[IMG]](https://photos.smugmug.com/RTW-on-dirt/2017-9-22-to-10-10/i-QmsL3vV/0/7de7c5c1/X2/mag-16-X2.jpg)
![[IMG]](https://photos.smugmug.com/RTW-on-dirt/2017-9-22-to-10-10/i-G6vLnVT/0/8cc8a80e/X2/mag-17-X2.jpg)
![[IMG]](https://photos.smugmug.com/RTW-on-dirt/2017-9-22-to-10-10/i-XHvN8wv/0/90c25041/X2/mag-21-X2.jpg)
![[IMG]](https://photos.smugmug.com/RTW-on-dirt/2017-9-22-to-10-10/i-qZG7Hjn/0/c18be817/X2/mag-19-X2.jpg)
![[IMG]](https://photos.smugmug.com/RTW-on-dirt/2017-9-22-to-10-10/i-3h6TvFV/0/5f4b1a64/X2/mag-20-X2.jpg)
![[IMG]](https://photos.smugmug.com/RTW-on-dirt/2017-9-22-to-10-10/i-RjPjHsp/0/d81fde03/X2/mag-22-X2.jpg)
![[IMG]](https://photos.smugmug.com/RTW-on-dirt/2017-9-22-to-10-10/i-3tCnzC9/0/2622157f/X2/mag-23-X2.jpg)
![[IMG]](https://photos.smugmug.com/RTW-on-dirt/2017-9-22-to-10-10/i-9j5bJWM/0/8504cce2/X2/mag-24-X2.jpg)
![[IMG]](https://photos.smugmug.com/RTW-on-dirt/2017-9-22-to-10-10/i-m24KzPZ/0/32f1d8ca/X2/mag-25-X2.jpg)
![[IMG]](https://photos.smugmug.com/RTW-on-dirt/2017-9-22-to-10-10/i-m82VdqH/0/1252a0e2/X2/mag-26-X2.jpg)
![[IMG]](https://photos.smugmug.com/RTW-on-dirt/2017-9-22-to-10-10/i-mkNkHFw/0/010c6c98/X2/mag-27-X2.jpg)
![[IMG]](https://photos.smugmug.com/RTW-on-dirt/2017-9-22-to-10-10/i-Xzk4vJT/0/71c82a69/X2/mag-29-X2.jpg)
![[IMG]](https://photos.smugmug.com/RTW-on-dirt/2017-9-22-to-10-10/i-TCXbdWb/0/709a2421/X2/mag-31-X2.jpg)
![[IMG]](https://photos.smugmug.com/RTW-on-dirt/2017-9-22-to-10-10/i-bzf2NZf/0/4633ef60/X2/mag-32-X2.jpg)
![[IMG]](https://photos.smugmug.com/RTW-on-dirt/2017-9-22-to-10-10/i-R3ThMjw/0/e8a059af/X2/mag-33-X2.jpg)
![[IMG]](https://photos.smugmug.com/RTW-on-dirt/2017-9-22-to-10-10/i-z5LCZ63/0/c678c18d/X2/mag-34-X2.jpg)
![[IMG]](https://photos.smugmug.com/RTW-on-dirt/2017-9-22-to-10-10/i-QjdMLz8/0/c0df270c/X2/mag-35-X2.jpg)
![[IMG]](https://photos.smugmug.com/RTW-on-dirt/2017-9-22-to-10-10/i-mtjxdMH/0/c9e27ab0/X2/mag-36-X2.jpg)


![[IMG]](https://photos.smugmug.com/RTW-on-dirt/2017-9-9-to-9-18/i-jkRdGj3/0/fa2fc039/X3/2017%209-9%20to%209-18-20-X3.jpg)
![[IMG]](https://photos.smugmug.com/RTW-on-dirt/2017-9-9-to-9-18/i-zH6qsHQ/0/65c27da1/X3/2017%209-9%20to%209-18-2-X3.jpg)
![[IMG]](https://photos.smugmug.com/RTW-on-dirt/2017-9-9-to-9-18/i-V7Rcqjt/0/44a00407/X3/2017%209-9%20to%209-18-23-X3.jpg)
![[IMG]](https://photos.smugmug.com/RTW-on-dirt/2017-9-9-to-9-18/i-WSj7WJr/0/94d7efaa/X2/2017%209-9%20to%209-18-4-X2.jpg)
![[IMG]](https://photos.smugmug.com/RTW-on-dirt/2017-9-9-to-9-18/i-HQPmrtK/0/ed21022d/X2/2017%209-9%20to%209-18-5-X2.jpg)
![[IMG]](https://photos.smugmug.com/RTW-on-dirt/2017-9-9-to-9-18/i-BNwJXxr/0/cd3518c3/X2/2017%209-9%20to%209-18-10-X2.jpg)
![[IMG]](https://photos.smugmug.com/RTW-on-dirt/2017-9-9-to-9-18/i-8WPwj7n/0/41bd0207/X2/2017%209-9%20to%209-18-11-X2.jpg)
![[IMG]](https://photos.smugmug.com/RTW-on-dirt/2017-9-9-to-9-18/i-d4CzVkc/0/f42e3618/X2/2017%209-9%20to%209-18-12-X2.jpg)
![[IMG]](https://photos.smugmug.com/RTW-on-dirt/2017-9-9-to-9-18/i-Jt8cs7f/0/12ea95a2/X2/2017%209-9%20to%209-18-14-X2.jpg)
![[IMG]](https://photos.smugmug.com/RTW-on-dirt/2017-9-9-to-9-18/i-r6Fk4r4/0/20ee5de0/X2/2017%209-9%20to%209-18-15-X2.jpg)
![[IMG]](https://photos.smugmug.com/RTW-on-dirt/2017-9-9-to-9-18/i-jXX7tmz/0/39a7538f/X2/2017%209-9%20to%209-18-16-X2.jpg)
![[IMG]](https://photos.smugmug.com/RTW-on-dirt/2017-9-9-to-9-18/i-4MpHmJH/0/ba0a9482/X2/2017%209-9%20to%209-18-17-X2.jpg)
![[IMG]](https://photos.smugmug.com/RTW-on-dirt/2017-9-9-to-9-18/i-P2BkHsv/0/799db82f/X2/2017%209-9%20to%209-18-19-X2.jpg)
![[IMG]](https://photos.smugmug.com/RTW-on-dirt/2017-9-9-to-9-18/i-sKxckDM/0/c3abe047/X2/2017%209-9%20to%209-18-24-X2.jpg)
![[IMG]](https://photos.smugmug.com/RTW-on-dirt/2017-9-9-to-9-18/i-HLScQnQ/0/d7dc087a/X2/2017%209-9%20to%209-18-26-X2.jpg)
![[IMG]](https://photos.smugmug.com/RTW-on-dirt/2017-9-9-to-9-18/i-spsjjCn/0/e6b72ae6/X2/2017%209-9%20to%209-18-27-X2.jpg)
![[IMG]](https://photos.smugmug.com/RTW-on-dirt/2017-9-9-to-9-18/i-sJ3ckcr/0/7a14143b/X2/2017%209-9%20to%209-18-30-X2.jpg)
![[IMG]](https://photos.smugmug.com/RTW-on-dirt/2017-9-9-to-9-18/i-RgpjmbR/0/47de5e53/X2/2017%209-9%20to%209-18-31-X2.jpg)
![[IMG]](https://photos.smugmug.com/RTW-on-dirt/2017-9-9-to-9-18/i-b9LP63Q/0/70cf94da/X2/2017%209-9%20to%209-18-33-X2.jpg)
![[IMG]](https://photos.smugmug.com/RTW-on-dirt/2017-9-9-to-9-18/i-nzb4LJk/0/61a71346/X2/2017%209-9%20to%209-18-35-X2.jpg)
![[IMG]](https://photos.smugmug.com/RTW-on-dirt/2017-9-9-to-9-18/i-xFzNsSc/0/b1c88f84/X2/2017%209-9%20to%209-18-39-X2.jpg)
![[IMG]](https://photos.smugmug.com/RTW-on-dirt/2017-9-9-to-9-18/i-SbPktPD/0/2939bcc6/X2/2017%209-9%20to%209-18-40-X2.jpg)
![[IMG]](https://photos.smugmug.com/RTW-on-dirt/2017-9-9-to-9-18/i-dJDwrgL/0/e2c7cc5e/X2/2017%209-9%20to%209-18-42-X2.jpg)
![[IMG]](https://photos.smugmug.com/RTW-on-dirt/2017-9-9-to-9-18/i-xSh7rMr/0/01ed2034/X2/2017%209-9%20to%209-18-44-X2.jpg)
![[IMG]](https://photos.smugmug.com/RTW-on-dirt/2017-9-9-to-9-18/i-JTQcdgP/0/a8146a48/X2/2017%209-9%20to%209-18-43-X2.jpg)
![[IMG]](https://photos.smugmug.com/RTW-on-dirt/For-dusty-W38M/i-wdhwDCp/0/d14402dd/X2/W38M-23-X2.jpg)
![[IMG]](https://photos.smugmug.com/RTW-on-dirt/For-dusty-W38M/i-3SZwqw4/0/141c8973/X2/W38M-30-X2.jpg)
![[IMG]](https://photos.smugmug.com/RTW-on-dirt/For-dusty-W38M/i-bCHjfrr/0/eeb68b86/X2/W38M-53-X2.jpg)
![[IMG]](https://photos.smugmug.com/RTW-on-dirt/2017-9-9-to-9-18/i-HZVCCs9/0/ea860dbd/X2/IMGP8561-X2.jpg)
![[IMG]](https://photos.smugmug.com/RTW-on-dirt/2017-9-9-to-9-18/i-W4GzDXg/0/c686838f/X2/IMGP8564-X2.jpg)
![[IMG]](https://photos.smugmug.com/RTW-on-dirt/For-dusty-W38M/i-Fsr4bxg/0/de103ba3/X2/W38M-67-X2.jpg)
![[IMG]](https://photos.smugmug.com/RTW-on-dirt/For-dusty-W38M/i-Qdwgzdx/0/0f91a4c8/X2/W38M-65-X2.jpg)
![[IMG]](https://photos.smugmug.com/RTW-on-dirt/For-dusty-W38M/i-QGkZ5NN/0/c606b7c5/X2/W38M-68-X2.jpg)
![[IMG]](https://photos.smugmug.com/RTW-on-dirt/For-dusty-W38M/i-JG7s2mb/0/2ffcce36/X2/W38M-69-X2.jpg)
![[IMG]](https://photos.smugmug.com/RTW-on-dirt/For-dusty-W38M/i-gwfqxsV/0/85c5eca1/X2/W38M-71-X2.jpg)
![[IMG]](https://photos.smugmug.com/RTW-on-dirt/For-dusty-W38M/i-D2TfJbm/0/e6b8cf69/X2/W38M-76-X2.jpg)
![[IMG]](https://photos.smugmug.com/RTW-on-dirt/For-dusty-W38M/i-7kfbQRm/0/6c5dae1c/X2/W38M-82-X2.jpg)
![[IMG]](https://photos.smugmug.com/RTW-on-dirt/2017-9-9-to-9-18/i-smPB8VQ/0/f03286f6/X2/2017%209-9%20to%209-18-47-X2.jpg)
![[IMG]](https://photos.smugmug.com/RTW-on-dirt/2017-9-9-to-9-18/i-BnMxRLs/0/b012dfde/X2/2017%209-9%20to%209-18-46-X2.jpg)
![[IMG]](https://photos.smugmug.com/RTW-on-dirt/2017-9-9-to-9-18/i-NjFL2sN/0/e65a4fe3/X2/2017%209-9%20to%209-18-48-X2.jpg)

![[IMG]](https://photos.smugmug.com/RTW-on-dirt/2017-9-7/i-d8kr6mG/0/2972294d/X2/2017-9-7-X2.jpg)
![[IMG]](https://photos.smugmug.com/RTW-on-dirt/2017-9-7/i-Xdd33tG/0/f034dc4b/X2/2017-9-7-2-X2.jpg)
![[IMG]](https://photos.smugmug.com/RTW-on-dirt/2017-9-7/i-fp7cs2f/0/b39ca19b/X2/2017-9-7-4-X2.jpg)
![[IMG]](https://photos.smugmug.com/RTW-on-dirt/2017-9-7/i-49g2Vzb/0/1b3c3c54/X2/2017-9-7-5-X2.jpg)
![[IMG]](https://photos.smugmug.com/RTW-on-dirt/2017-9-7/i-9dd8P5R/0/cbbab172/X2/2017-9-7-6-X2.jpg)
![[IMG]](https://photos.smugmug.com/RTW-on-dirt/2017-9-7/i-jQbBkcp/0/2cc43adc/X3/2017-9-7-31-X3.jpg)
![[IMG]](https://photos.smugmug.com/RTW-on-dirt/2017-9-7/i-phfw6pX/0/cbb061d3/X2/2017-9-7-13-X2.jpg)
![[IMG]](https://photos.smugmug.com/RTW-on-dirt/2017-9-7/i-hp2PMmk/0/7ac5d4ce/X3/2017-9-7-32-X3.jpg)
![[IMG]](https://photos.smugmug.com/RTW-on-dirt/2017-9-7/i-FRcd9vQ/0/85f43b1b/X2/2017-9-7-33-X2.jpg)
![[IMG]](https://photos.smugmug.com/RTW-on-dirt/2017-9-7/i-HQG46Ww/0/668c5037/X2/2017-9-7-19-X2.jpg)
![[IMG]](https://photos.smugmug.com/RTW-on-dirt/2017-9-7/i-XHrgjKR/0/77cfbeaf/X2/2017-9-7-24-X2.jpg)
![[IMG]](https://photos.smugmug.com/RTW-on-dirt/2017-9-7/i-rjGctbK/0/0f7afd40/X3/2017-9-7-26-X3.jpg)
![[IMG]](https://photos.smugmug.com/RTW-on-dirt/2017-9-7/i-kfNw4B4/0/5d484f75/X2/17-9-7-4-X2.jpg)
![[IMG]](https://photos.smugmug.com/RTW-on-dirt/2017-9-7/i-hLK9sTS/0/f1420979/X2/2017-9-7-27-X2.jpg)
![[IMG]](https://photos.smugmug.com/RTW-on-dirt/2017-9-7/i-cSvbBwQ/0/b868bea5/X2/17-9-7-3-X2.jpg)
![[IMG]](https://photos.smugmug.com/RTW-on-dirt/2017-9-7/i-L984n85/0/ae8b35b2/X3/2017-9-7-30-X3.jpg)

