
Left my room with a view returned to Ixcateopan de Cuauhtémoc for Cuauhtémoc’s birthday celebrations, the town was slowly filling with 5000 Aztecs from all over the American Continent.
![[IMG]](https://photos.smugmug.com/RTW-on-dirt-2018/2018-feb-10-to-25/i-rBrQPRX/0/4259427f/XL/DSC02858-XL.jpg)
@SkizzMan brought me down my new 70-200-2.8 lens from the US and I was really looking forward to getting some great shots with it. Sadly unknown to me it was internally broken, lens had shifted and shots were fractionally out of focus and I didn’t notice until the end of the day as I was shooting constantly for hours but from around 1000+ shots only a dozen were close to average in my eyes…seriously pissed as these were for possibly another article for Egle for the BBC.
I’ll share a few of what i have but what I thought was going to be the best ended up on the cutting room floor, shame because i had some great angles/ faces/ scenes – take that into account…not the quality I wanted or like to share, I’ll let the pictures do the talking
![[IMG]](https://photos.smugmug.com/RTW-on-dirt-2018/2018-feb-10-to-25/i-mZs4TW9/0/8c9e0ced/XL/_IMG2882-XL.jpg)
![[IMG]](https://photos.smugmug.com/RTW-on-dirt-2018/2018-feb-10-to-25/i-D58M6bk/0/290a76e5/XL/_IMG2885-XL.jpg)
![[IMG]](https://photos.smugmug.com/RTW-on-dirt-2018/2018-feb-10-to-25/i-X9tswCp/0/af7efad2/XL/_IMG2887-XL.jpg)
![[IMG]](https://photos.smugmug.com/RTW-on-dirt-2018/2018-feb-10-to-25/i-x4Fndfv/0/b55a9b0a/XL/_IMG2889-XL.jpg)
![[IMG]](https://photos.smugmug.com/RTW-on-dirt-2018/2018-feb-10-to-25/i-LQ3WwWC/0/079ef86a/XL/_IMG2896-XL.jpg)
The (former) church doors were pen and celebration dances would be happening all day long
![[IMG]](https://photos.smugmug.com/RTW-on-dirt-2018/2018-feb-10-to-25/i-Xkv5Cmq/0/d97b3470/XL/_IMG2906-XL.jpg)
![[IMG]](https://photos.smugmug.com/RTW-on-dirt-2018/2018-feb-10-to-25/i-pXS83W4/0/ec83c173/X3/_IMG2928-X3.jpg)
![[IMG]](https://photos.smugmug.com/RTW-on-dirt-2018/2018-feb-10-to-25/i-Qz3zDwz/0/57f525fc/XL/_IMG2958-XL.jpg)
![[IMG]](https://photos.smugmug.com/RTW-on-dirt-2018/2018-feb-10-to-25/i-W68BbdT/0/b3a5075a/XL/_IMG2970-XL.jpg)
![[IMG]](https://photos.smugmug.com/RTW-on-dirt-2018/2018-feb-10-to-25/i-48tsmzf/0/694d19db/XL/_IMG3012-XL.jpg)
![[IMG]](https://photos.smugmug.com/RTW-on-dirt-2018/2018-feb-10-to-25/i-gfKTRQd/0/809047bc/XL/_IMG3024-XL.jpg)
![[IMG]](https://photos.smugmug.com/RTW-on-dirt-2018/2018-feb-10-to-25/i-s4HM3qS/0/7dd5f6df/X3/_IMG3036-X3.jpg)
![[IMG]](https://photos.smugmug.com/RTW-on-dirt-2018/2018-feb-10-to-25/i-h3GmLwb/0/b3d3a9a7/XL/_IMG3054-XL.jpg)
![[IMG]](https://photos.smugmug.com/RTW-on-dirt-2018/2018-feb-10-to-25/i-NM8qTCh/0/9ec90774/X3/_IMG3103-X3.jpg)
![[IMG]](https://photos.smugmug.com/RTW-on-dirt-2018/2018-feb-10-to-25/i-TW9BqMz/0/59340812/XL/_IMG3118-XL.jpg)
![[IMG]](https://photos.smugmug.com/RTW-on-dirt-2018/2018-feb-10-to-25/i-4vRbW8K/0/dbe6b28b/X3/_IMG3130-X3.jpg)
![[IMG]](https://photos.smugmug.com/RTW-on-dirt-2018/2018-feb-10-to-25/i-dGrMvrs/0/a76f3ec1/XL/_IMG3142-XL.jpg)
![[IMG]](https://photos.smugmug.com/RTW-on-dirt-2018/2018-feb-10-to-25/i-8VLjJjZ/0/ae6eb6ec/XL/_IMG3205-XL.jpg)
![[IMG]](https://photos.smugmug.com/RTW-on-dirt-2018/2018-feb-10-to-25/i-JngXnRM/0/889601e3/XL/_IMG3250-XL.jpg)
![[IMG]](https://photos.smugmug.com/RTW-on-dirt-2018/2018-feb-10-to-25/i-JrK9n5g/0/dc41a21c/X3/_IMG3264-X3.jpg)
![[IMG]](https://photos.smugmug.com/RTW-on-dirt-2018/2018-feb-10-to-25/i-Vm6Tt2K/0/b0cc3fe5/XL/_IMG3310-XL.jpg)
![[IMG]](https://photos.smugmug.com/RTW-on-dirt-2018/2018-feb-10-to-25/i-zXBD3M4/0/d4bea9c9/XL/_IMG3312-XL.jpg)
![[IMG]](https://photos.smugmug.com/RTW-on-dirt-2018/2018-feb-10-to-25/i-HJRqhsn/0/4c1c12fa/XL/_IMG3320-XL.jpg)
![[IMG]](https://photos.smugmug.com/RTW-on-dirt-2018/2018-feb-10-to-25/i-mtvLX7w/0/3adb7892/X3/_IMG3355-X3.jpg)
![[IMG]](https://photos.smugmug.com/RTW-on-dirt-2018/2018-feb-10-to-25/i-Cw652Js/0/f2307bbf/X3/_IMG3360-X3.jpg)
![[IMG]](https://photos.smugmug.com/RTW-on-dirt-2018/2018-feb-10-to-25/i-Qm4WDbq/0/c31e3aa7/XL/_IMG3365-XL.jpg)
![[IMG]](https://photos.smugmug.com/RTW-on-dirt-2018/2018-feb-10-to-25/i-whRW6VL/0/d24d8a90/XL/_IMG3366-XL.jpg)
We were looking at maps and realizing we are moving a LOT slower than we thought, I’d been looking at @LoneStar report and since September he’s down to Ushuaia and now heading back north, but for us as the crow flies due south since the same date we’ve only gone 1353 miles south and more amazingly since December 22nd only 132 miles!!!
Over the last few weeks, I’ll give you an idea why, we went from Morelia to Taxco, to CDMX, to Taxco, to CDMX to Taxco and now are here for another week, I think we like this place and @Taxco Guru is a great host, next time you are here, send him a PM and see if he has space for you (discounted Airbnb for riders)
So maybe I should change the title to “Lesuirely riding RTW….” but we will we add some significant miles in the next few weeks and a border crossing as we’ve decided to go to Semana Santa in Antigua, Guatemala starting March 25th.
…but in the meantime, what have we seen?
More Mexico of course, its a lot more wealthy than most think, actually 15th in the world for GDP but walking around you realize that there is such a massive gap between 1st and 15th and it shows in the little things the most.
Walking around a market in Mexico City there are the normal souvenirs you expect to see
![[IMG]](https://photos.smugmug.com/RTW-on-dirt-2018/2018-march-3-to-5/i-gpSQkJz/0/13e5ea61/XL/_IMG3467-XL.jpg)
![[IMG]](https://photos.smugmug.com/RTW-on-dirt-2018/2018-march-3-to-5/i-t8gXWQ2/0/6f4ce871/XL/_IMG3479-XL.jpg)
![[IMG]](https://photos.smugmug.com/RTW-on-dirt-2018/2018-march-3-to-5/i-48T6pLQ/0/3b25de4a/X3/_IMG3485-X3.jpg)
![[IMG]](https://photos.smugmug.com/RTW-on-dirt-2018/2018-march-3-to-5/i-F7BtzR5/0/1c57faf3/X3/_IMG3474-X3.jpg)
all the above is local artwork, the painstaking hours to produce is amazing, the first three are hand painted, of course, the last one is all hand laid individual beads. Imagine the hours, days or even weeks that goes into that and how cheap items are sold…the mind boggles, Mexico is a country that deserves time to be spent here and to be immersed. The people are amazing, sadly corrupted by legal and illegal gangsters but the country is changing a lot, so if you can come and see it before it changes too much, you’ll be glad you did
…but of course, there are still things that make the mind boggle how you ever get connected for us to report back what we see…
![[IMG]](https://photos.smugmug.com/RTW-on-dirt-2018/2018-march-3-to-5/i-qQP8SPK/0/a386fc10/XL/_IMG3505-XL.jpg)
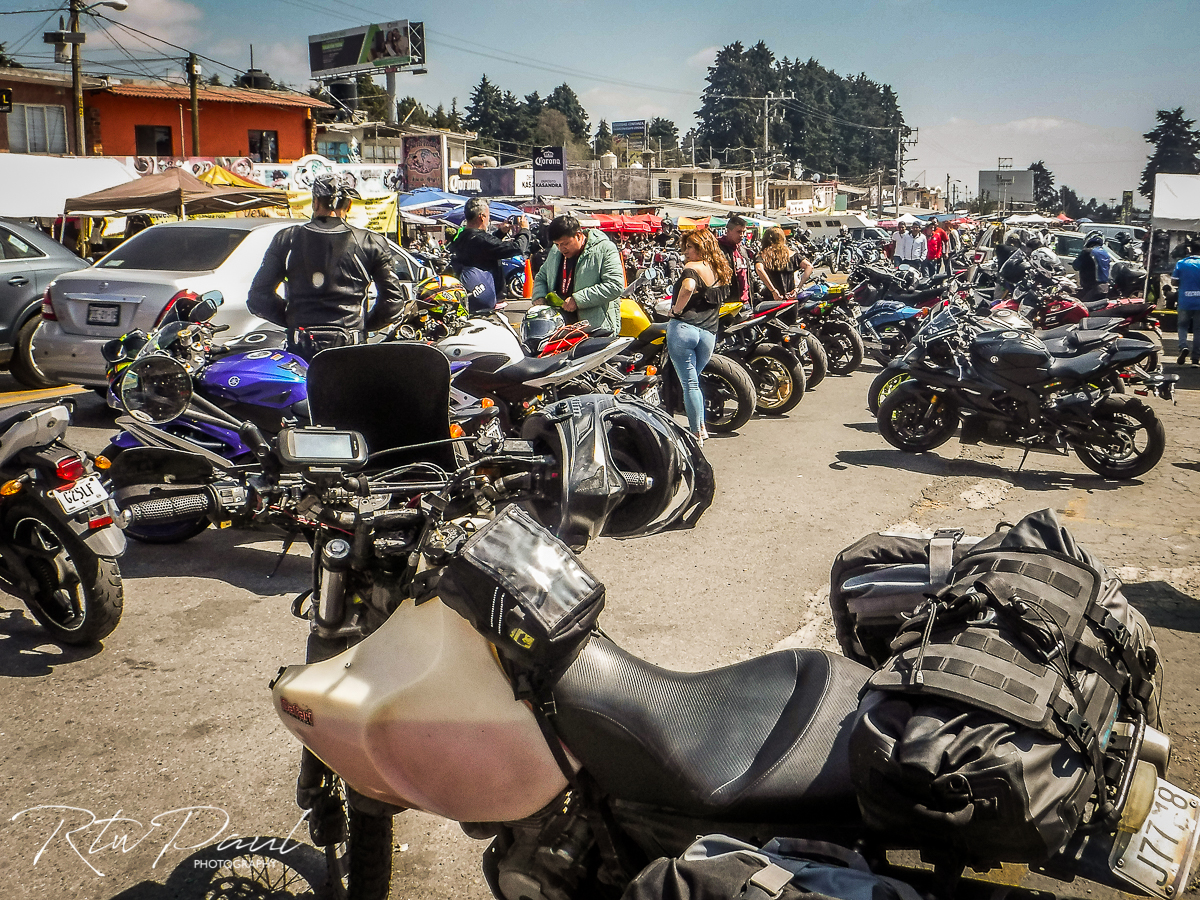
Mexico City, formally know as DF, but now known as just CDMX is a big city 20-25 million people in a space that realistically should only hold 10-20% of that number, it is known on this forum as a black hole that adventure riders get swallowed up by, so surprisingly few actually visit!
Its just a big city people, I use Open Source maps and every single street was on them, its easy to find your way around, its just busy with loads of traffic, but you can lane split…don’t miss it even if you just come for 1 or 2 days to see how absolute chaos works on a daily basis, its actually fun.
We wandered the city and like most other areas, we don’t have space for souvenirs sadly, so pictures are our memories and people watching is our pastime
![[IMG]](https://photos.smugmug.com/RTW-on-dirt-2018/2018-march-3-to-5/i-VB4bX4V/0/da64dc62/X3/_IMG3492-X3.jpg)
![[IMG]](https://photos.smugmug.com/RTW-on-dirt-2018/2018-march-3-to-5/i-mpCKbFJ/0/0fd04b94/XL/_IMG3500-XL.jpg)
![[IMG]](https://photos.smugmug.com/RTW-on-dirt-2018/2018-march-3-to-5/i-HfrCC4w/0/81e49cf5/X3/_IMG3522-X3.jpg)
![[IMG]](https://photos.smugmug.com/RTW-on-dirt-2018/2018-march-3-to-5/i-xD96Dmw/0/fc32a406/XL/_IMG3512-XL.jpg)
The heart of the City, they have just introduced double-decker buses and had them on show explaining to people that there was an upstairs, and it was free, go have a look…
![[IMG]](https://photos.smugmug.com/RTW-on-dirt-2018/2018-march-3-to-5/i-zmWTc74/0/6935fd73/XL/_IMG3579-Pano-XL.jpg)
![[IMG]](https://photos.smugmug.com/RTW-on-dirt-2018/2018-march-3-to-5/i-zf5fDc9/0/d7489940/XL/_IMG3751-XL.jpg)
difficult to tell from the above shot but the church is leaning down a lot to the left, inside they make it really easy to understand how much, there is this massive plumb bob showing the movement over the years and while we were in there, there was a very minor earthquake happening, maybe only 1. something but the plumb bob started to swing slightly.
![[IMG]](https://photos.smugmug.com/RTW-on-dirt-2018/2018-march-3-to-5/i-GxZzZD2/0/4d2b973e/X3/_IMG3596-X3.jpg)
The street directly behind the church shows it in more of a dramatic fashion if you follow the line of the windows, roofs, and balconies
![[IMG]](https://photos.smugmug.com/RTW-on-dirt-2018/2018-march-3-to-5/i-qWcMBbT/0/c4f42d11/XL/_IMG3748-XL.jpg)
The Aztecs from Ixcateopan had ventured north after the festival and I had a chance of redeeming myself slightly grabbing some dancing shots and close-ups, sadly the backdrop wasn’t as good
![[IMG]](https://photos.smugmug.com/RTW-on-dirt-2018/2018-march-3-to-5/i-D5VVdQb/0/13a767bf/X3/_IMG3604-X3.jpg)
![[IMG]](https://photos.smugmug.com/RTW-on-dirt-2018/2018-march-3-to-5/i-TMfGgXh/0/da0ab443/X3/_IMG3639-X3.jpg)
![[IMG]](https://photos.smugmug.com/RTW-on-dirt-2018/2018-march-3-to-5/i-FxNzp3x/0/5877d188/X2/_IMG3641-X2.jpg)
![[IMG]](https://photos.smugmug.com/RTW-on-dirt-2018/2018-march-3-to-5/i-HsntxqB/0/5153f248/XL/_IMG3669-XL.jpg)
![[IMG]](https://photos.smugmug.com/RTW-on-dirt-2018/2018-march-3-to-5/i-GShHzbW/0/b1f8c11d/X3/_IMG3731-X3.jpg)
Then right there in one of the most expensive places in Mexico, what we talked about a few posts back for those of you who didn’t read the article, this is a guy from a first world country, a ‘begpacker’ doing his thing, the first line reads –
“traveling without money……!”
Local people looking at him with disdain, as they are struggling themselves but instead of begging they are making things, selling things, offering assistance, looking for jobs, offering tours…but him, no, just give me money! He was the only person I saw begging with a sign my whole time in CDMX
![[IMG]](https://photos.smugmug.com/RTW-on-dirt-2018/2018-march-3-to-5/i-2nbZ4ns/0/1b80c3bc/X3/_IMG3749-X3.jpg)
About 30 miles northeast of CDMX is Teotihuacán formerly the largest city in Mexico, (which of course is now CDMX), in the 1600’s it was bigger than London during the times of Henry the 8th, only Paris, Venice and Constantinople (now Istambul) were bigger
This is where the Pyramids of the Moon and Sun are and this means time for some exercise, most of the steps are double the height of normal steps, and its over 7000′ and its over 90 degrees, so getting out of breath is going to happen before the top
This is the Pyramid of the Sun
![[IMG]](https://photos.smugmug.com/RTW-on-dirt-2018/2018-march-3-to-5/i-6RddJ8D/0/8057e630/XL/_IMG3834-XL.jpg)
![[IMG]](https://photos.smugmug.com/RTW-on-dirt-2018/2018-march-3-to-5/i-w8dKPJ8/0/864a99e4/XL/_IMG3790-XL.jpg)
From the top
![[IMG]](https://photos.smugmug.com/RTW-on-dirt-2018/2018-march-3-to-5/i-tBnkKxT/0/4da55efe/X3/_IMG3801-X3.jpg)
This is the Pyramid of the Moon
![[IMG]](https://photos.smugmug.com/RTW-on-dirt-2018/2018-march-3-to-5/i-xrmWTZd/0/4520af5d/XL/_IMG3792-XL.jpg)
![[IMG]](https://photos.smugmug.com/RTW-on-dirt-2018/2018-march-3-to-5/i-NgvZF9j/0/eb9ec52f/XL/_IMG3800-XL.jpg)
The view from the Pyramid of the Moon down the Avenue of the Dead
![[IMG]](https://photos.smugmug.com/RTW-on-dirt-2018/2018-march-3-to-5/i-Z7ZpmMk/0/e6b6b4f0/XL/_IMG3827-3-XL.jpg)
Then its back to Taxco, where there is always something going on…
http://api.smugmug.com/services/embed/PRtVDQj?width=640&height=360

![[IMG]](https://photos.smugmug.com/RTW-on-dirt-2018/2018-feb-10-to-25/i-rzGvPgS/0/9d2b7758/XL/DSCF0204-XL.jpg)
![[IMG]](https://photos.smugmug.com/RTW-on-dirt-2018/2018-feb-10-to-25/i-qDnScsn/0/ae3f3527/XL/DSCF0209-XL.jpg)
![[IMG]](https://photos.smugmug.com/RTW-on-dirt-2018/2018-feb-10-to-25/i-pWRhh7S/0/174e3e17/XL/IMGP0787-XL.jpg)
![[IMG]](https://photos.smugmug.com/RTW-on-dirt-2018/2018-feb-10-to-25/i-BMbq9X9/0/671dca24/XL/IMGP0793-XL.jpg)
![[IMG]](https://photos.smugmug.com/RTW-on-dirt-2018/2018-feb-10-to-25/i-PPmGdCw/0/62eca394/XL/IMGP0796-XL.jpg)
![[IMG]](https://photos.smugmug.com/RTW-on-dirt-2018/2018-feb-10-to-25/i-TWcQsVb/0/c0178374/XL/IMGP0799-XL.jpg)
![[IMG]](https://photos.smugmug.com/RTW-on-dirt-2018/2018-feb-10-to-25/i-3tCzmNG/0/2fe15f84/XL/IMGP0810-XL.jpg)
![[IMG]](https://photos.smugmug.com/RTW-on-dirt-2018/2018-feb-10-to-25/i-sCwJLjc/0/dd92bad5/XL/IMGP0826-XL.jpg)
![[IMG]](https://photos.smugmug.com/RTW-on-dirt-2018/2018-feb-10-to-25/i-63VmBGP/0/fb4d9b71/XL/IMGP0828-XL.jpg)
![[IMG]](https://photos.smugmug.com/RTW-on-dirt-2018/2018-feb-10-to-25/i-J2LNmH6/0/7fa59b44/XL/DSC02827-XL.jpghttps://photos.smugmug.com/RTW-on-dirt-2018/2018-feb-10-to-25/i-VG3hZsv/0/5704a362/XL/IMGP0840-XL.jpg)
![[IMG]](https://photos.smugmug.com/RTW-on-dirt-2018/2018-feb-10-to-25/i-3gnrqnk/0/03500713/XL/IMGP2414-XL.jpg)
![[IMG]](https://photos.smugmug.com/RTW-on-dirt-2018/2018-feb-10-to-25/i-xdt8jRL/0/29820ddb/XL/IMGP2429-XL.jpg)
![[IMG]](https://photos.smugmug.com/RTW-on-dirt-2018/2018-feb-10-to-25/i-z9jDCST/0/dcc5f3be/L/IMGP2436-L.jpg)
![[IMG]](https://photos.smugmug.com/RTW-on-dirt-2018/2018-feb-10-to-25/i-3Z6Zbdd/0/8e41accc/L/IMGP2437-L.jpg)
![[IMG]](https://photos.smugmug.com/RTW-on-dirt-2018/2018-feb-10-to-25/i-GL6BK2N/0/55a76069/L/IMGP2438-L.jpg)
![[IMG]](https://photos.smugmug.com/RTW-on-dirt-2018/2018-feb-10-to-25/i-5P9HthW/0/db3e50fe/L/IMGP2439-L.jpg)
![[IMG]](https://photos.smugmug.com/RTW-on-dirt-2018/2018-feb-10-to-25/i-rXMFmgX/0/e0a32b6d/L/IMGP2441-L.jpg)
![[IMG]](https://photos.smugmug.com/RTW-on-dirt-2018/2018-feb-10-to-25/i-wMZV3Qc/0/d9b6f50c/L/IMGP2443-L.jpg)
![[IMG]](https://photos.smugmug.com/RTW-on-dirt-2018/2018-feb-10-to-25/i-TNQN9DT/0/32391a05/L/IMGP2445-L.jpg)
![[IMG]](https://photos.smugmug.com/RTW-on-dirt-2018/2018-feb-10-to-25/i-5CzKkfw/0/68802052/L/IMGP2448-L.jpg)
![[IMG]](https://photos.smugmug.com/RTW-on-dirt-2018/2018-feb-10-to-25/i-W2Q9ZVG/0/9ccfa9fa/L/IMGP2446-L.jpg)
![[IMG]](https://photos.smugmug.com/RTW-on-dirt-2018/2018-feb-10-to-25/i-Q6pNPbp/0/8996605c/L/IMGP2447-L.jpg)
![[IMG]](https://photos.smugmug.com/RTW-on-dirt-2018/2018-feb-10-to-25/i-FWjb8jS/0/66792aa0/L/IMGP2449-L.jpg)
![[IMG]](https://photos.smugmug.com/RTW-on-dirt-2018/2018-feb-10-to-25/i-rCN546s/0/ccf35eda/XL/IMGP2450-XL.jpg)
![[IMG]](https://photos.smugmug.com/RTW-on-dirt-2018/2018-feb-10-to-25/i-rHZFQPR/0/6f19ea8a/XL/IMGP2453-XL.jpg)
![[IMG]](https://photos.smugmug.com/RTW-on-dirt-2018/2018-feb-10-to-25/i-Fmk9gj4/0/d14045c6/XL/IMGP2454-XL.jpg)
![[IMG]](https://photos.smugmug.com/RTW-on-dirt-2018/2018-feb-10-to-25/i-tHkrX73/0/c1dea2d3/XL/IMGP2545-XL.jpg)
![[IMG]](https://photos.smugmug.com/RTW-on-dirt-2018/2018-feb-10-to-25/i-tb2wD8M/0/3cb512e7/XL/IMGP2474-XL.jpg)
![[IMG]](https://photos.smugmug.com/RTW-on-dirt-2018/2018-feb-10-to-25/i-4cLFHsr/0/6a30f6a5/XL/IMGP2458-XL.jpg)
![[IMG]](https://photos.smugmug.com/RTW-on-dirt-2018/2018-feb-10-to-25/i-f4S5j8P/0/faae9414/XL/IMGP2466-XL.jpg)
![[IMG]](https://photos.smugmug.com/RTW-on-dirt-2018/2018-feb-10-to-25/i-xDhnKWb/0/11638b80/X3/IMGP2492-X3.jpg)
![[IMG]](https://photos.smugmug.com/RTW-on-dirt-2018/2018-feb-10-to-25/i-JjTkvbw/0/fa753410/X3/IMGP2482-X3.jpg)
![[IMG]](https://photos.smugmug.com/RTW-on-dirt-2018/2018-feb-10-to-25/i-VGvJfDG/0/6e6985a2/XL/IMGP2520-XL.jpg)
![[IMG]](https://photos.smugmug.com/RTW-on-dirt-2018/2018-feb-10-to-25/i-s6sg2TF/0/c51ad356/XL/IMGP2506-XL.jpg)
![[IMG]](https://photos.smugmug.com/RTW-on-dirt-2018/2018-feb-10-to-25/i-r7hS8c3/0/2e598fd9/XL/IMGP2538-XL.jpg)
![[IMG]](https://photos.smugmug.com/RTW-on-dirt-2018/2018-feb-10-to-25/i-w9kprBh/0/27b37246/XL/IMGP2543-XL.jpg)
![[IMG]](https://photos.smugmug.com/RTW-on-dirt-2018/2018-feb-10-to-25/i-krJgBF6/0/19d2ac11/XL/IMGP2530-XL.jpg)
![[IMG]](https://photos.smugmug.com/RTW-on-dirt-2018/2018-feb-10-to-25/i-HVGdPmW/0/04092c6b/XL/IMGP2534-XL.jpg)
![[IMG]](https://photos.smugmug.com/RTW-on-dirt-2018/2018-feb-10-to-25/i-hmBqfnq/0/270b3ba9/XL/IMGP2546-XL.jpg)
![[IMG]](https://photos.smugmug.com/RTW-on-dirt-2018/2018-feb-10-to-25/i-ns2svmQ/0/6748a6d4/XL/IMGP2549-XL.jpg)
![[IMG]](https://photos.smugmug.com/RTW-on-dirt-2018/2018-feb-10-to-25/i-XWG73vM/0/5569aceb/XL/IMGP2561-XL.jpg)
![[IMG]](https://photos.smugmug.com/RTW-on-dirt-2018/2018-feb-10-to-25/i-HvmK9qR/0/39ec1f88/XL/DSC02840-XL.jpg)
![[IMG]](https://photos.smugmug.com/RTW-on-dirt-2018/2018-feb-10-to-25/i-9gQNQZM/0/c9e39606/XL/DSCF0218-XL.jpg)
![[IMG]](https://photos.smugmug.com/RTW-on-dirt-2018/2018-feb-10-to-25/i-PhcMXg9/0/3631b23a/XL/IMGP2844-XL.jpg)
![[IMG]](https://photos.smugmug.com/RTW-on-dirt-2018/2018-feb-10-to-25/i-RFdDB78/0/97154920/XL/20180220_211756-XL.jpg)
![[IMG]](https://photos.smugmug.com/RTW-on-dirt-2018/2018-feb-10-to-25/i-xNF3BNd/0/13da54f5/XL/IMGP2571-XL.jpg)
![[IMG]](https://photos.smugmug.com/RTW-on-dirt-2018/2018-feb-10-to-25/i-MhgtSHF/0/a382eba2/XL/IMGP2584-2-XL.jpg)
![[IMG]](https://photos.smugmug.com/RTW-on-dirt-2018/2018-feb-10-to-25/i-ZnBZGXd/0/f576b3bd/XL/IMGP2599-XL.jpg)
![[IMG]](https://photos.smugmug.com/RTW-on-dirt-2018/2018-feb-10-to-25/i-MjSmLBT/0/90f2a4f8/XL/IMGP2602-XL.jpg)
![[IMG]](https://photos.smugmug.com/RTW-on-dirt-2018/2018-feb-10-to-25/i-XSshMGM/0/91039f0c/XL/IMGP2621-XL.jpg)
![[IMG]](https://photos.smugmug.com/RTW-on-dirt-2018/2018-feb-10-to-25/i-hb4jqbT/0/90095d99/XL/IMGP2623-XL.jpg)
![[IMG]](https://photos.smugmug.com/RTW-on-dirt-2018/2018-feb-10-to-25/i-GF4qB4T/0/913fcedb/XL/IMGP2651-XL.jpg)
![[IMG]](https://photos.smugmug.com/RTW-on-dirt-2018/2018-feb-10-to-25/i-DWCZZBT/0/92d37ea0/XL/IMGP2654-XL.jpg)
![[IMG]](https://photos.smugmug.com/RTW-on-dirt-2018/2018-feb-10-to-25/i-Jm92GJ2/0/dd2e6366/XL/IMGP2656-XL.jpg)
![[IMG]](https://photos.smugmug.com/RTW-on-dirt-2018/2018-feb-10-to-25/i-755hkbW/0/58ae0e7c/XL/IMGP2721-XL.jpg)
![[IMG]](https://photos.smugmug.com/RTW-on-dirt-2018/2018-feb-10-to-25/i-Fm5vgVM/0/74cab267/XL/IMGP2677-XL.jpg)
![[IMG]](https://photos.smugmug.com/RTW-on-dirt-2018/2018-feb-10-to-25/i-F7xjWf9/0/aeafc556/X3/IMGP2740-X3.jpg)
![[IMG]](https://photos.smugmug.com/RTW-on-dirt-2018/2018-feb-10-to-25/i-qd9MLfF/0/5087be0a/XL/IMGP2759-XL.jpg)
![[IMG]](https://photos.smugmug.com/RTW-on-dirt-2018/2018-feb-10-to-25/i-tk2DVWC/0/648f0b08/XL/IMGP2774-XL.jpg)
![[IMG]](https://photos.smugmug.com/RTW-on-dirt-2018/2018-feb-10-to-25/i-d4rqW5s/0/f4bf5d97/XL/IMGP2819-XL.jpg)
![[IMG]](https://photos.smugmug.com/RTW-on-dirt-2018/2018-feb-10-to-25/i-S7Lzfzk/0/4f9f4137/XL/IMGP2829-XL.jpg)
![[IMG]](https://photos.smugmug.com/RTW-on-dirt-2018/2018-feb-10-to-25/i-LB8wCN4/0/4de592f4/XL/DSC02848-XL.jpg)
![[IMG]](https://photos.smugmug.com/RTW-on-dirt-2018/2018-feb-10-to-25/i-j7BcgPx/0/4eb009a8/XL/DSC02850-XL.jpg)


![[IMG]](https://photos.smugmug.com/RTW-on-dirt-2018/2018-feb-7-to-13/i-S5ScKfL/0/170d7003/XL/taxco-12-XL.jpg)
![[IMG]](https://photos.smugmug.com/RTW-on-dirt-2018/2018-feb-7-to-13/i-JPN9DJ3/0/a47ba655/XL/taxco-16-XL.jpg)
![[IMG]](https://photos.smugmug.com/RTW-on-dirt-2018/2018-feb-7-to-13/i-tgSM4q5/0/b36d6b15/X3/taxco-3-X3.jpg)
![[IMG]](https://photos.smugmug.com/RTW-on-dirt-2018/2018-feb-7-to-13/i-qKfQ7hk/0/dd2ac28e/XL/taxco-19-XL.jpg)
![[IMG]](https://photos.smugmug.com/RTW-on-dirt-2018/2018-feb-7-to-13/i-t8pwRwG/0/50774d4c/XL/taxco-29-XL.jpg)
![[IMG]](https://photos.smugmug.com/RTW-on-dirt-2018/2018-feb-7-to-13/i-83W5fKt/0/4e0d81bc/XL/taxco-20-XL.jpg)
![[IMG]](https://photos.smugmug.com/RTW-on-dirt-2018/2018-feb-7-to-13/i-FdtwWdT/0/79e8b3ba/X3/taxco-23-X3.jpg)
![[IMG]](https://photos.smugmug.com/RTW-on-dirt-2018/2018-feb-7-to-13/i-XPCdhQk/0/307e1feb/XL/taxco-25-XL.jpg)
![[IMG]](https://photos.smugmug.com/RTW-on-dirt-2018/2018-feb-7-to-13/i-pp9csRw/0/be6002b9/XL/taxco-5-XL.jpg)
![[IMG]](https://photos.smugmug.com/RTW-on-dirt-2018/2018-feb-7-to-13/i-7W6NH4t/0/25d8254c/XL/taxco-46-XL.jpg)
![[IMG]](https://photos.smugmug.com/RTW-on-dirt-2018/2018-feb-7-to-13/i-57VTt5q/0/4556a7ac/XL/taxco-47-XL.jpg)
![[IMG]](https://photos.smugmug.com/RTW-on-dirt-2018/2018-feb-7-to-13/i-PfqrdFQ/0/f11188bf/XL/taxco-32-XL.jpg)
![[IMG]](https://photos.smugmug.com/RTW-on-dirt-2018/2018-feb-7-to-13/i-L5PPXnT/0/cd052ad0/XL/taxco-11-XL.jpg)
![[IMG]](https://photos.smugmug.com/RTW-on-dirt-2018/2018-feb-7-to-13/i-68pqKsD/0/89ad019e/XL/taxco-35-XL.jpg)
![[IMG]](https://photos.smugmug.com/RTW-on-dirt-2018/2018-feb-7-to-13/i-Fdw9X86/0/e5538b13/XL/taxco-38-XL.jpg)
![[IMG]](https://photos.smugmug.com/RTW-on-dirt-2018/2018-feb-7-to-13/i-G6QTTPw/0/18817668/XL/taxco-39-XL.jpg)
![[IMG]](https://photos.smugmug.com/RTW-on-dirt-2018/2018-feb-7-to-13/i-MtS9cdv/0/5fee4502/XL/taxco-40-XL.jpg)
![[IMG]](https://photos.smugmug.com/RTW-on-dirt-2018/2018-feb-7-to-13/i-P7m5KH6/0/b1b4c95d/XL/taxco-41-XL.jpg)
![[IMG]](https://photos.smugmug.com/RTW-on-dirt-2018/2018-feb-7-to-13/i-ShMbFK3/0/142c0ab8/XL/taxco-42-XL.jpg)
![[IMG]](https://photos.smugmug.com/RTW-on-dirt-2018/2018-feb-7-to-13/i-P47Qftd/0/55dc4476/XL/taxco-44-XL.jpg)
![[IMG]](https://photos.smugmug.com/RTW-on-dirt-2018/2018-feb-7-to-13/i-4knfxpW/0/cf6dbfcb/XL/taxco-51-XL.jpg)
![[IMG]](https://photos.smugmug.com/RTW-on-dirt-2018/2018-feb-7-to-13/i-hSJdJRg/0/1f402816/XL/taxco-49-XL.jpg)
![[IMG]](https://photos.smugmug.com/RTW-on-dirt-2018/2018-feb-7-to-13/i-GPjsMwZ/0/b1d0c8b0/XL/taxco-52-XL.jpg)

![[IMG]](https://photos.smugmug.com/RTW-on-dirt-2018/2018-jan-15th-to-feb-4th/i-WMgJZCt/0/53c7f147/XL/january%202018-2-XL.jpg)
![[IMG]](https://photos.smugmug.com/RTW-on-dirt-2018/2018-jan-15th-to-feb-4th/i-FzMRnWP/0/70087e02/XL/january%202018-3-XL.jpg)
![[IMG]](https://photos.smugmug.com/RTW-on-dirt-2018/2018-jan-15th-to-feb-4th/i-NWQpSQk/0/ec89832a/XL/january%202018-6-XL.jpg)
![[IMG]](https://photos.smugmug.com/RTW-on-dirt-2018/2018-jan-15th-to-feb-4th/i-9qtxQch/0/8329b740/XL/january%202018-7-XL.jpg)
![[IMG]](https://photos.smugmug.com/RTW-on-dirt-2018/2018-jan-15th-to-feb-4th/i-tFB9QWH/0/ba3f3a58/XL/january%202018-4-XL.jpg)
![[IMG]](https://photos.smugmug.com/RTW-on-dirt-2018/2018-jan-15th-to-feb-4th/i-ctk5Pp6/0/72937cc8/XL/january%202018-42-XL.jpg)
![[IMG]](https://photos.smugmug.com/RTW-on-dirt-2018/2018-jan-15th-to-feb-4th/i-HdJqhws/0/b21b3ca8/XL/january%202018-10-XL.jpg)
![[IMG]](https://photos.smugmug.com/RTW-on-dirt-2018/2018-jan-15th-to-feb-4th/i-nVw3MWR/0/6e40aef0/XL/DSC02496-Edit-XL.jpg)
![[IMG]](https://photos.smugmug.com/RTW-on-dirt-2018/2018-jan-15th-to-feb-4th/i-hxM3ZSt/0/ea0f08d3/XL/january%202018-12-XL.jpg)
![[IMG]](https://photos.smugmug.com/RTW-on-dirt-2018/2018-jan-15th-to-feb-4th/i-mWzbsZj/0/0957408c/XL/january%202018-14-XL.jpg)
![[IMG]](https://photos.smugmug.com/RTW-on-dirt-2018/2018-jan-15th-to-feb-4th/i-kbGgnsc/0/7aaebbac/XL/january%202018-17-XL.jpg)
![[IMG]](https://photos.smugmug.com/RTW-on-dirt-2018/2018-jan-15th-to-feb-4th/i-DtMCP7k/0/1683ab12/XL/january%202018-19-XL.jpg)
![[IMG]](https://photos.smugmug.com/RTW-on-dirt-2018/2018-jan-15th-to-feb-4th/i-7dcD9j7/0/ece50762/XL/january%202018-21-XL.jpg)
![[IMG]](https://photos.smugmug.com/RTW-on-dirt-2018/2018-jan-15th-to-feb-4th/i-WpnG4Nd/0/98ee0395/XL/january%202018-23-XL.jpg)
![[IMG]](https://photos.smugmug.com/RTW-on-dirt-2018/2018-jan-15th-to-feb-4th/i-G39k8kZ/0/49c3dfcf/XL/january%202018-22-XL.jpg)
![[IMG]](https://photos.smugmug.com/RTW-on-dirt-2018/2018-jan-15th-to-feb-4th/i-kbnn549/0/82ccf02e/XL/january%202018-58-XL.jpg)
![[IMG]](https://photos.smugmug.com/RTW-on-dirt-2018/2018-jan-15th-to-feb-4th/i-K2jgbTg/0/f71f1216/XL/january%202018-25-XL.jpg)
![[IMG]](https://photos.smugmug.com/RTW-on-dirt-2018/2018-jan-15th-to-feb-4th/i-xB8TJZc/0/bc938cde/XL/january%202018-31-XL.jpg)
![[IMG]](https://photos.smugmug.com/RTW-on-dirt-2018/2018-jan-15th-to-feb-4th/i-WjQ5Z5K/0/64a90ea6/XL/january%202018-33-XL.jpg)
![[IMG]](https://photos.smugmug.com/RTW-on-dirt-2018/2018-jan-15th-to-feb-4th/i-pNPwVtM/0/aeaf1371/XL/january%202018-35-XL.jpg)
![[IMG]](https://photos.smugmug.com/RTW-on-dirt-2018/2018-jan-15th-to-feb-4th/i-LkSB4Rc/0/77f75802/XL/january%202018-37-XL.jpg)
![[IMG]](https://photos.smugmug.com/RTW-on-dirt-2018/2018-jan-15th-to-feb-4th/i-26f2wGr/0/0c45e915/XL/january%202018-38-XL.jpg)
![[IMG]](https://photos.smugmug.com/RTW-on-dirt-2018/2018-jan-15th-to-feb-4th/i-NxHjZQm/0/ab5dc65a/XL/january%202018-45-XL.jpg)
![[IMG]](https://photos.smugmug.com/RTW-on-dirt-2018/2018-jan-15th-to-feb-4th/i-XfWj4CD/0/37dc9de0/XL/january%202018-48-XL.jpg)
![[IMG]](https://photos.smugmug.com/RTW-on-dirt-2018/2018-jan-15th-to-feb-4th/i-nvLJFzD/0/6f340a6e/XL/january%202018-49-XL.jpg)
![[IMG]](https://photos.smugmug.com/RTW-on-dirt-2018/2018-jan-15th-to-feb-4th/i-jsKKBzm/0/a3b69a41/XL/january%202018-51-XL.jpg)
![[IMG]](https://photos.smugmug.com/RTW-on-dirt-2018/2018-jan-15th-to-feb-4th/i-Ft36dt6/0/f080ad3b/XL/january%202018-52-XL.jpg)
![[IMG]](https://photos.smugmug.com/RTW-on-dirt-2018/2018-jan-15th-to-feb-4th/i-cQjt4dk/0/a0fa7764/XL/january%202018-54-XL.jpg)
![[IMG]](https://photos.smugmug.com/RTW-on-dirt-2018/2018-jan-15th-to-feb-4th/i-23HW7c3/0/13bfda00/XL/january%202018-55-XL.jpg)
![[IMG]](https://photos.smugmug.com/RTW-on-dirt-2018/2018-jan-15th-to-feb-4th/i-hTcN7dn/0/3f42a8d3/XL/january%202018-56-XL.jpg)
![[IMG]](https://photos.smugmug.com/RTW-on-dirt-2018/2018-jan-15th-to-feb-4th/i-g4TKqsZ/0/434142b7/XL/january%202018-57-XL.jpg)
![[IMG]](https://photos.smugmug.com/RTW-on-dirt-2018/2017-feb-6/i-CKnMqrT/0/12f3e314/XL/feb%206-2-XL.jpg)
![[IMG]](https://photos.smugmug.com/RTW-on-dirt-2018/2017-feb-6/i-9PrGXS6/0/d1e74534/XL/feb%206-15-XL.jpg)
![[IMG]](https://photos.smugmug.com/RTW-on-dirt-2018/2017-feb-6/i-GfLWJ4N/0/7f7cf74e/XL/feb%206-12-XL.jpg)
![[IMG]](https://photos.smugmug.com/RTW-on-dirt-2018/2017-feb-6/i-J9V7rsr/0/c986ccd1/XL/feb%206-16-XL.jpg)
![[IMG]](https://photos.smugmug.com/RTW-on-dirt-2018/2017-feb-6/i-Xsk4K6s/0/011cc3ee/XL/feb%206-17-XL.jpg)
![[IMG]](https://photos.smugmug.com/RTW-on-dirt-2018/2017-feb-6/i-MR78jtj/0/0afd8af7/XL/feb%206-24-XL.jpg)
![[IMG]](https://photos.smugmug.com/RTW-on-dirt-2018/2017-feb-6/i-mzfMwFH/0/1f0e0671/XL/feb%206-27-XL.jpg)
![[IMG]](https://photos.smugmug.com/RTW-on-dirt-2018/2017-feb-6/i-B3Bgg6G/0/7d12f59a/XL/feb%206-29-XL.jpg)
![[IMG]](https://photos.smugmug.com/RTW-on-dirt-2018/2017-feb-6/i-X386X3h/0/dc568280/XL/feb%206-30-XL.jpg)
![[IMG]](https://photos.smugmug.com/RTW-on-dirt-2018/2017-feb-6/i-WVCJBPT/0/b7ccd294/XL/feb%206-31-XL.jpg)
![[IMG]](https://photos.smugmug.com/RTW-on-dirt-2018/2017-feb-6/i-qwSPttX/0/6d5fdfad/XL/feb%206-32-XL.jpg)
![[IMG]](https://photos.smugmug.com/RTW-on-dirt-2018/2017-feb-6/i-wscNdWg/0/a78f3ba3/XL/feb%206-33-XL.jpg)


![[IMG]](https://photos.smugmug.com/RTW-on-dirt/2018-to-jan-12/i-VHvM5vr/0/b6cc8b06/L/dec%2030%20to%20jan%2012-32-L.jpg)
![[IMG]](https://photos.smugmug.com/RTW-on-dirt/2018-to-jan-12/i-MsWrqNv/0/27ec252c/L/dec%2030%20to%20jan%2012-33-L.jpg)
![[IMG]](https://photos.smugmug.com/RTW-on-dirt/2018-to-jan-12/i-shVmn77/0/ea0cc197/L/dec%2030%20to%20jan%2012-43-L.jpg)
![[IMG]](https://photos.smugmug.com/RTW-on-dirt/2018-to-jan-12/i-B5dz4qd/0/7e186b2b/L/dec%2030%20to%20jan%2012-45-L.jpg)
![[IMG]](https://photos.smugmug.com/RTW-on-dirt/Guanajuato/i-hm32qN9/0/09d4756c/XL/guanajuato-18-XL.jpg)
![[IMG]](https://photos.smugmug.com/RTW-on-dirt/2018-to-jan-12/i-SVr6Wd8/0/9bb9f7ba/L/dec%2030%20to%20jan%2012-47-L.jpg)
![[IMG]](https://photos.smugmug.com/RTW-on-dirt/Guanajuato/i-QZ8gxgm/0/f2674e2a/XL/guanajuato-22-XL.jpg)
![[IMG]](https://photos.smugmug.com/RTW-2016/Sept-13-19/i-MbjQBSZ/0/26720a2b/X2/sept%2013-19-14-X2.jpg)
![[IMG]](https://photos.smugmug.com/RTW-on-dirt/2018-to-jan-12/i-4WdrFZ2/0/7557fd20/L/dec%2030%20to%20jan%2012-48-L.jpg)
![[IMG]](https://photos.smugmug.com/RTW-on-dirt/2018-to-jan-12/i-Bp9jgcJ/0/72b59daf/L/dec%2030%20to%20jan%2012-49-L.jpg)
![[IMG]](https://photos.smugmug.com/RTW-on-dirt/Guanajuato/i-PFktpTx/0/cbd49b92/XL/guanajuato-31-XL.jpg)
![[IMG]](https://photos.smugmug.com/RTW-on-dirt/Guanajuato/i-mwDXS8v/0/65d0f111/XL/guanajuato-29-XL.jpg)
![[IMG]](https://photos.smugmug.com/RTW-on-dirt/Guanajuato/i-SmhBqSG/0/bf166b90/XL/guanajuato-24-XL.jpg)
![[IMG]](https://photos.smugmug.com/RTW-on-dirt/Guanajuato/i-Vzcr9jx/0/f6456a54/XL/guanajuato-25-XL.jpg)
![[IMG]](https://photos.smugmug.com/RTW-on-dirt/Guanajuato/i-PbGKrFx/0/58f5a3a2/XL/guanajuato-26-XL.jpg)
![[IMG]](https://photos.smugmug.com/RTW-on-dirt/Guanajuato/i-xVJTNZw/0/3f807843/XL/guanajuato-21-XL.jpg)
![[IMG]](https://photos.smugmug.com/RTW-on-dirt/Guanajuato/i-KQD98K5/0/3df673d4/XL/guanajuato-XL.jpg)
![[IMG]](https://photos.smugmug.com/RTW-on-dirt/Guanajuato/i-k6vrDgC/0/240b36b7/XL/guanajuato-4-XL.jpg)
![[IMG]](https://photos.smugmug.com/RTW-on-dirt/Guanajuato/i-D47G2BC/0/d68e1136/XL/guanajuato-6-XL.jpg)
![[IMG]](https://photos.smugmug.com/RTW-on-dirt/Guanajuato/i-n8QxSxn/0/b67f8275/XL/guanajuato-7-XL.jpg)
![[IMG]](https://photos.smugmug.com/RTW-on-dirt/Guanajuato/i-X5vscsW/0/42eae48f/XL/guanajuato-11-XL.jpg)
![[IMG]](https://photos.smugmug.com/RTW-on-dirt/Guanajuato/i-RRzp42L/0/93ec1fee/XL/guanajuato-14-XL.jpg)
![[IMG]](https://photos.smugmug.com/RTW-on-dirt/Guanajuato/i-HMgqmGQ/0/b8c5194b/XL/guanajuato-12-XL.jpg)
![[IMG]](https://photos.smugmug.com/RTW-on-dirt/Guanajuato/i-KzMvm6m/0/9cce5283/XL/guanajuato-16-XL.jpg)


![[IMG]](https://photos.smugmug.com/RTW-on-dirt/2018-to-jan-12/i-mBx9wDm/0/758b5a18/X2/december%20mexico-49-X2.jpg)
![[IMG]](https://photos.smugmug.com/RTW-on-dirt/2018-to-jan-12/i-bjsK6GV/0/ffa3d961/X2/december%20mexico-27-X2.jpg)
![[IMG]](https://photos.smugmug.com/RTW-on-dirt/2018-to-jan-12/i-7SFth3V/0/ca1714ac/L/dec%2030%20to%20jan%2012-38-L.jpg)
![[IMG]](https://photos.smugmug.com/RTW-on-dirt/2018-to-jan-12/i-RFBSdtz/0/5bc7e4c4/L/dec%2030%20to%20jan%2012-39-L.jpg)
![[IMG]](https://photos.smugmug.com/RTW-on-dirt/2018-to-jan-12/i-M8PcCrW/0/32bcad49/L/dec%2030%20to%20jan%2012-19-L.jpg)
![[IMG]](https://photos.smugmug.com/RTW-on-dirt/2018-to-jan-12/i-BBXqntg/0/30a0bbc3/L/dec%2030%20to%20jan%2012-35-L.jpg)
![[IMG]](https://photos.smugmug.com/RTW-on-dirt/2018-to-jan-12/i-LZpr2bW/0/b537da3b/L/dec%2030%20to%20jan%2012-37-L.jpg)
![[IMG]](https://photos.smugmug.com/RTW-on-dirt/2018-to-jan-12/i-BfCMvqH/0/ab677eb4/L/dec%2030%20to%20jan%2012-40-L.jpg)
![[IMG]](https://photos.smugmug.com/RTW-on-dirt/2018-to-jan-12/i-MnpZ6hZ/0/7f6be8f7/X2/dec%2030%20to%20jan%2012-4-X2.jpg)
![[IMG]](https://photos.smugmug.com/RTW-on-dirt/2018-to-jan-12/i-7sJM4Dz/0/6ec0dd41/L/dec%2030%20to%20jan%2012-10-L.jpg)
![[IMG]](https://photos.smugmug.com/RTW-on-dirt/2018-to-jan-12/i-hvntH8C/0/539e5a7e/X2/dec%2030%20to%20jan%2012-20-X2.jpg)
![[IMG]](https://photos.smugmug.com/RTW-on-dirt/2018-to-jan-12/i-RT5FWP9/0/2c618c9a/X2/dec%2030%20to%20jan%2012-21-X2.jpg)
![[IMG]](https://photos.smugmug.com/RTW-on-dirt/2018-to-jan-12/i-whjtDHz/0/89d386ca/X2/dec%2030%20to%20jan%2012-22-X2.jpg)
![[IMG]](https://photos.smugmug.com/RTW-on-dirt/2018-to-jan-12/i-xfXSLnk/0/8974e017/L/dec%2030%20to%20jan%2012-23-L.jpg)
![[IMG]](https://photos.smugmug.com/RTW-on-dirt/2018-to-jan-12/i-mRqkF7W/0/ec252ca7/XL/dec%2030%20to%20jan%2012-42-XL.jpg)
![[IMG]](https://photos.smugmug.com/RTW-on-dirt/2018-to-jan-12/i-sVXgsFM/0/8a5a1820/L/dec%2030%20to%20jan%2012-24-L.jpg)
![[IMG]](https://photos.smugmug.com/RTW-on-dirt/2018-to-jan-12/i-DrCKLZG/0/56928d2a/L/dec%2030%20to%20jan%2012-25-L.jpg)
![[IMG]](https://photos.smugmug.com/RTW-on-dirt/2018-to-jan-12/i-rTfWvk9/0/671e86e8/X2/dec%2030%20to%20jan%2012-26-X2.jpg)
![[IMG]](https://photos.smugmug.com/RTW-on-dirt/2018-to-jan-12/i-vM8sDdm/0/7f854b3e/L/dec%2030%20to%20jan%2012-29-L.jpg)
![[IMG]](https://photos.smugmug.com/RTW-on-dirt/2018-to-jan-12/i-dRX2xFt/0/2ce5353e/X3/dec%2030%20to%20jan%2012-30-X3.jpg)


![[IMG]](https://photos.smugmug.com/RTW-on-dirt/2017-dec-17th-to-29th/i-8QC6tGB/0/5a48f60c/X2/december%20mexico-99-X2.jpg)
![[IMG]](https://photos.smugmug.com/RTW-on-dirt/2017-dec-17th-to-29th/i-ZqZwVZv/0/f36757e5/X2/december%20mexico-44-X2.jpg)
![[IMG]](https://photos.smugmug.com/RTW-on-dirt/2017-dec-17th-to-29th/i-tm8hhCL/0/e0c17299/X2/december%20mexico-100-X2.jpg)
![[IMG]](https://photos.smugmug.com/RTW-on-dirt/2017-dec-17th-to-29th/i-6XxHfcM/0/d9265b02/X2/december%20mexico-102-X2.jpg)
![[IMG]](https://photos.smugmug.com/RTW-on-dirt/2017-dec-17th-to-29th/i-f67r84P/0/e660d1ab/X2/december%20mexico-103-X2.jpg)
![[IMG]](https://photos.smugmug.com/RTW-on-dirt/2017-dec-17th-to-29th/i-Dgkk9Rg/0/c4dde423/X2/december%20mexico-51-X2.jpg)
![[IMG]](https://photos.smugmug.com/RTW-on-dirt/2017-dec-17th-to-29th/i-KTSkqN8/0/ce773f3d/X2/december%20mexico-105-X2.jpg)


![[IMG]](https://photos.smugmug.com/RTW-on-dirt/2017-dec-17th-to-29th/i-CxhH4BX/0/440bb33c/X2/december%20mexico-131-X2.jpg)
![[IMG]](https://photos.smugmug.com/RTW-on-dirt/2017-dec-17th-to-29th/i-g7nWjjp/0/35c5c23d/X2/december%20mexico-143-X2.jpg)

![[IMG]](https://photos.smugmug.com/RTW-on-dirt/2017-dec-17th-to-29th/i-jxgkD5t/0/6a331c3c/X2/december%20mexico-144-X2.jpg)
![[IMG]](https://photos.smugmug.com/RTW-on-dirt/2017-dec-17th-to-29th/i-9HhB6gW/0/9b0aaa1e/X2/december%20mexico-X2.jpg)
![[IMG]](https://photos.smugmug.com/RTW-on-dirt/2017-dec-17th-to-29th/i-xr3NptC/0/f9dae29d/X2/december%20mexico-4-X2.jpg)
![[IMG]](https://photos.smugmug.com/RTW-on-dirt/2017-dec-17th-to-29th/i-ZPRxQfb/0/e7cb841a/X2/december%20mexico-13-X2.jpg)
![[IMG]](https://photos.smugmug.com/RTW-on-dirt/2017-dec-17th-to-29th/i-zSPfC9F/0/58586295/X2/december%20mexico-10-X2.jpg)
![[IMG]](https://photos.smugmug.com/RTW-on-dirt/2017-dec-17th-to-29th/i-b9fgx6W/0/8c272957/X3/december%20mexico-19-X3.jpg)
![[IMG]](https://photos.smugmug.com/RTW-on-dirt/2017-dec-17th-to-29th/i-LvNWXK6/0/a66be6d5/X2/december%20mexico-6-X2.jpg)
![[IMG]](https://photos.smugmug.com/RTW-on-dirt/2017-dec-17th-to-29th/i-M4jhHb2/0/4744b930/X2/december%20mexico-11-X2.jpg)
![[IMG]](https://photos.smugmug.com/RTW-on-dirt/2017-dec-17th-to-29th/i-DrnWnz2/0/11bbde4c/X2/december%20mexico-20-X2.jpg)
![[IMG]](https://photos.smugmug.com/RTW-on-dirt/2017-dec-17th-to-29th/i-NfLFrB9/0/7775cca9/X2/december%20mexico-21-X2.jpg)
![[IMG]](https://photos.smugmug.com/RTW-on-dirt/2017-dec-17th-to-29th/i-L6tZGPc/0/717f65a6/X2/december%20mexico-22-X2.jpg)
![[IMG]](https://photos.smugmug.com/RTW-on-dirt/2017-dec-17th-to-29th/i-ktkR6nm/0/07b41482/X2/december%20mexico-23-X2.jpg)
![[IMG]](https://photos.smugmug.com/RTW-on-dirt/2017-dec-17th-to-29th/i-kRB5Bzm/0/3c4b6005/X2/december%20mexico-24-X2.jpg)
![[IMG]](https://photos.smugmug.com/RTW-on-dirt/2017-dec-17th-to-29th/i-tSDppR8/0/8cfd99e5/X2/december%20mexico-25-X2.jpg)
![[IMG]](https://photos.smugmug.com/RTW-on-dirt/2017-dec-17th-to-29th/i-7M3DQbJ/0/af8e8f1d/X2/december%20mexico-14-X2.jpg)
![[IMG]](https://photos.smugmug.com/RTW-on-dirt/2017-dec-17th-to-29th/i-tZ2QxM2/0/1776550b/X2/december%20mexico-15-X2.jpg)
![[IMG]](https://photos.smugmug.com/RTW-on-dirt/2017-dec-17th-to-29th/i-BTbCLFZ/0/cd18e3b0/X2/december%20mexico-26-X2.jpg)
![[IMG]](https://photos.smugmug.com/RTW-on-dirt/2017-dec-17th-to-29th/i-TDn5dz5/0/8430d863/X2/color%20touch%20drawing-X2.jpg)
![[IMG]](https://photos.smugmug.com/RTW-on-dirt/2017-dec-17th-to-29th/i-kqvG6Lt/0/618c9fac/X2/december%20mexico-104-X2.jpg)
![[IMG]](https://photos.smugmug.com/RTW-on-dirt/2017-dec-17th-to-29th/i-FHFktVC/0/2d473f46/X2/december%20mexico-31-X2.jpg)
![[IMG]](https://photos.smugmug.com/RTW-on-dirt/2017-dec-17th-to-29th/i-LPrSQKc/0/e82057c5/X2/december%20mexico-33-X2.jpg)
![[IMG]](https://photos.smugmug.com/RTW-on-dirt/2017-dec-17th-to-29th/i-KTNMrkJ/0/fd77b9f0/X2/december%20mexico-34-X2.jpg)
![[IMG]](https://photos.smugmug.com/RTW-on-dirt/2017-dec-17th-to-29th/i-nKNFpCM/0/967d7b62/X2/december%20mexico-36-X2.jpg)
![[IMG]](https://photos.smugmug.com/RTW-on-dirt/2017-dec-17th-to-29th/i-XmJCBFW/0/39b9be3a/X2/december%20mexico-37-X2.jpg)
![[IMG]](https://photos.smugmug.com/RTW-on-dirt/2017-dec-17th-to-29th/i-JS8352m/0/5b0e2b4b/X2/december%20mexico-38-X2.jpg)
![[IMG]](https://photos.smugmug.com/RTW-on-dirt/2017-dec-17th-to-29th/i-JjJmZB8/0/382f1ffe/X2/december%20mexico-40-X2.jpg)
![[IMG]](https://photos.smugmug.com/RTW-on-dirt/2017-dec-17th-to-29th/i-68gmrtm/0/5b5192ca/X2/december%20mexico-48-X2.jpg)
![[IMG]](https://photos.smugmug.com/RTW-on-dirt/2017-dec-17th-to-29th/i-6RMLK9t/0/0f533367/X2/december%20mexico-50-X2.jpg)
![[IMG]](https://photos.smugmug.com/RTW-on-dirt/2017-dec-17th-to-29th/i-Lv4RTzk/0/e1c1b21e/X2/december%20mexico-52-X2.jpg)
![[IMG]](https://photos.smugmug.com/RTW-on-dirt/2017-dec-17th-to-29th/i-47XtHxK/0/a4fdebe3/X2/december%20mexico-55-X2.jpg)
![[IMG]](https://photos.smugmug.com/RTW-on-dirt/2017-dec-17th-to-29th/i-sT9tQDV/0/3a379c0c/X2/december%20mexico-57-X2.jpg)
![[IMG]](https://photos.smugmug.com/RTW-on-dirt/2017-dec-17th-to-29th/i-2BwZhfb/0/eb9713ae/X2/december%20mexico-63-X2.jpg)
![[IMG]](https://photos.smugmug.com/RTW-on-dirt/2017-dec-17th-to-29th/i-Gk5gmTk/0/8f4a953d/X2/december%20mexico-70-X2.jpg)
![[IMG]](https://photos.smugmug.com/RTW-on-dirt/2017-dec-17th-to-29th/i-Z3HMfTc/0/39239c93/X2/december%20mexico-64-X2.jpg)
![[IMG]](https://photos.smugmug.com/RTW-on-dirt/2017-dec-17th-to-29th/i-KhXPGxh/0/aa805992/X2/december%20mexico-92-X2.jpg)
![[IMG]](https://photos.smugmug.com/RTW-on-dirt/2017-dec-17th-to-29th/i-gJHchBg/0/7f68fcda/X2/december%20mexico-96-X2.jpg)
![[IMG]](https://photos.smugmug.com/RTW-on-dirt/2017-dec-17th-to-29th/i-dTzXQD2/0/7c340f4d/X2/december%20mexico-98-X2.jpg)
![[IMG]](https://photos.smugmug.com/RTW-on-dirt/2017-dec-17th-to-29th/i-t42X9St/0/cf23cc08/X2/december%20mexico-66-X2.jpg)
![[IMG]](https://photos.smugmug.com/RTW-on-dirt/2017-dec-17th-to-29th/i-QHQDhrf/0/45b77f79/X2/december%20mexico-39-X2.jpg)
![[IMG]](https://photos.smugmug.com/RTW-on-dirt/2017-dec-17th-to-29th/i-pRf7dHS/0/16c56f32/X2/december%20mexico-72-X2.jpg)
![[IMG]](https://photos.smugmug.com/RTW-on-dirt/2017-dec-17th-to-29th/i-tTq4WCs/0/573793b1/X2/december%20mexico-73-X2.jpg)
![[IMG]](https://photos.smugmug.com/RTW-on-dirt/2017-dec-17th-to-29th/i-JRb5h4H/0/6a88868e/X2/december%20mexico-30-X2.jpg)
![[IMG]](https://photos.smugmug.com/RTW-on-dirt/2017-dec-17th-to-29th/i-gj4kjvg/0/81353247/X2/december%20mexico-58-X2.jpg)


